apm
98 TopicsA Method for Auth and SSO
Recently, we discovered Cyberark has moved from the traditional HTML based auth page to the new JavaScript based. So, our client initiated sso method isn't working anymore. Webssso process could not identify the html form objects because there is no html form anymore. The new design relies on a bunch of JavaScripts which coordinates client browser to send requested data to be able to login. I never interested in JS and could not point out where the user credential comes into play either. I've found out another method to make SSO function work again. It is very basic and relies on the sideband method but i prefer to use http auth agent rather than sideband iRule. Since the "Http Auth" profile can store the http status code along with the cookies of the HTTP request we made, we can use it for basic jobs as "Sideband Http Requestor" Long story short, basically we sent crafted login request to auth page and it returns a couple of cookies[1] if credentials are valid. Then we sent those cookies to the client as a reponse. That is all. An iRule with two distict function is good enoug for this particular job. One function is to prepare json payload which we sent to the web service and the other one is parse the cookies from the response of the web service. You need a custom "HTTP Auth" profile. You can take a look at the below[2] as an example. HTTP Auth profile can be used only with http services not https. In order to use Http Auth profile for sending & receiving http messages to an https web service, you need to use a http2https virtual server which translates requests and responses. In my example[2] i sent http requests through a fake virtual server which is listening on "54.54.54.54:80" socket. The cyberark servers are attached in the pool behind this virtual server. I used this method for Grafana first around a year ago and it is still working. The grafana has similar login page which relies on JS. Here is my iRule: when CLIENT_ACCEPTED { ACCESS::restrict_irule_events disable } when ACCESS_POLICY_COMPLETED { if {[ACCESS::session data get {session.policy.result}] == "allow" } { log local0. "APM Session Started Successfuly in [ACCESS::session data get {session.user.sessionid}] for [ACCESS::session data get {session.logon.last.username}]" log local0. "APM DEBUG: Policy Complete Cookies: $respCookie_0 $respCookie_1 $respCookie_2" ACCESS::respond 302 Location "https://testpam.example.com/PasswordVault/v10/Accounts" "Connection" "close" "Set-Cookie" ${respCookie_0} "Set-Cookie" ${respCookie_1} "Set-Cookie" ${respCookie_2} } } when HTTP_REQUEST { if {[HTTP::has_responded]} { return } if {[string tolower [HTTP::path]] == "/logoff"} { set sid [ACCESS::session data get {session.user.sessionid}] log local0. "Logging out from [ACCESS::session data get {session.user.sessionid}] for [ACCESS::session data get {session.logon.last.username}]" HTTP::respond 302 noserver Location "https://testpam.example.com/PasswordVault/v10" "Connection" "close" "Set-Cookie" "CA11111=; expires=Thu, 01-Jan-1970 00:00:00 GMT; path=/PasswordVault/; secure; HttpOnly; SameSite=Strict" "Set-Cookie" "CA22222=; expires=expires=Thu, 01-Jan-1970 00:00:00 GMT; path=/PasswordVault/; secure; HttpOnly; SameSite=Strict" "Set-Cookie" "CA66666=; expires=Thu, 01-Jan-1970 00:00:00 GMT; path=/PasswordVault/; secure; HttpOnly; SameSite=Stric" ACCESS::session remove -sid $sid } } when ACCESS_POLICY_AGENT_EVENT { if {[ACCESS::policy agent_id] == "LoginSessionCreate" } { # Generate JSON payload to sent the Cyberark v10 set uname [ACCESS::session data get {session.logon.last.username}] set passwd [ACCESS::session data get -secure {session.sso.token.last.password}] log local0. "APM DEBUG: User: $uname : $passwd" set payload {{"username":"UUUU","password":"PPPP"}} set cred "UUUU $uname PPPP $passwd" set payload [string map "$cred" $payload] log local0. "APM DEBUG: Payload $payload" ACCESS::session data set session.custom.http.payload $payload } if {[ACCESS::policy agent_id] == "CookiePreperation" } { #### HTTP Auth #### if {([ACCESS::session data get {session.http.last.response_cookie}] != "") && ([ACCESS::session data get {session.http.last.response_status}] == 200) } { # HTTP Auth Succeed set cookies [ACCESS::session data get {session.http.last.response_cookie}] log local0. "APM DEBUG: Raw Cookies: $cookies" set cookies [string trimright [string map { \\r\\n @ } $cookies] "@"] set cookies [split $cookies '@'] log local0. "APM DEBUG: Cookies Now: $cookies" set listCount 0 foreach cookie $cookies { if {![string match CA* $cookie]} { continue } log local0. "APM DEBUG: listCount: $listCount Cookie: $cookie" set respCookie_${listCount} $cookie incr listCount } log local0. "APM DEBUG: Total listCount: $listCount RespCookie: $respCookie_0 $respCookie_1 $respCookie_2" } } } I also have attached a screenshot of the APM policy. In that APM policy the "GrafanaLogin" is the HTTP Auth agent. Logging lines in the iRule can be suppressed as per your needs. Hope this is helpful for someone. [1]: Cookie names are: "CA11111", "CA22222", "CA66666" [2]: apm aaa http /Common/CyberArk_Login { auth-type custom-post connection-timeout 3 content-type none custom-body "%{session.custom.http.payload}" form-action http://54.54.54.54/PasswordVault/api/login/ headers { header0 { name Content-Type value application/json } } request-timeout 5 success-match-type cookie success-match-value CA11111 } May the source be with you...37Views1like0CommentsKASM Workspaces Integration with F5 BIG-IP Zero Trust Access (formerly APM)
Introduction F5 BIG-IP Zero Trust Access, a key component of the F5 Application Delivery and Security Platform (ADSP), helps teams secure apps that are spread across hybrid, multi-cloud and AI environments. In this article, I’ll show you how to secure your Kasm Workspace using F5 BIG-IP Zero Trust Access. Kasm Workspaces Kasm Workspaces is a containerized streaming platform designed for secure, web-based access to desktops, applications, and web browsing. It leverages container technology to deliver virtualized environments directly to users' browsers, enhancing security, scalability, and performance. Commonly used for remote work, cybersecurity, and DevOps workflows, Kasm Workspaces provides a flexible and customizable solution for organizations needing secure and efficient access to virtual resources. As noted in the Kasm Documentation, the Kasm Workspaces Web App Role servers should not be exposed directly to the public. That’s where F5 BIG-IP Zero Trust Access can help. Demo Video Deployment Prerequisites F5 BIG-IP version 17.x Zero Trust Access version 10.x Kasm Workspaces version 1.17 installed and configured properly Configure using Automation Toolchain with AS3 and FAST Templates The F5 BIG-IP Automation Toolchain is a suite of tools designed to automate the deployment, configuration, and management of F5 BIG-IP devices. It enables efficient and consistent management using declarative APIs, templates, and integrations with popular automation frameworks. Application services (FAST) templates are predefined configurations that streamline the deployment and management of applications by providing consistent and repeatable setups. NOTE: The configuration using the Automation Toolchain is well-documented in this DevCentral article, which also includes demo videos: How I did it - “Delivering Kasm Workspaces three ways” Configure Manually Using a Virtual Server This article will focus on the manual configuration of the BIG-IP using a Virtual Server. Configuring it this way will give you a deeper understanding of how all the components work together to create a cohesive solution. Network Environment Linux “External” client IP: 10.1.10.4 BIG-IP “External” Self IP: 10.1.10.10 BIG-IP “Internal” Self IP: 10.1.20.10 Kasm Workspace IP: 10.1.20.23 BIG-IP Configuration Create HTTP Monitor: First, let’s create the HTTP Monitor for the Kasm Workspace server. From Local Traffic > Monitors > click the green plus sign to add a new one. Give it a name, “Kasm-Monitor” in this example Set the Type to HTTP Enter the following for the Send String: GET /api/__healthcheck\r\n Enter the following for the Receive String: OK It should look like this: Set Reverse to Yes and click Finished Create Pool: Next we’ll create the Pool From Local Traffic > Pools > Pool List > click the plus sign to add a new one Give it a name, “Kasm-Pool” in this example Select the Health Monitor you created previously and click the arrows to move it to Active Under Resources specify a Node Name, “Kasm-Server” in this example Specify the IP Address, “10.1.20.23” in this example Set the Service Port to 443, then click Add Click Finished Create Virtual Server: Next we’ll create the Virtual Server From Local Traffic > Virtual Servers > Virtual Server List > click the plus sign to add a new one Give it a Name, “vs_kasm” in this example. Keep the Type as Standard. Set the Destination to the IP Address you want the BIG-IP to listen on for connections to the Kasm server, “10.1.10.100” in this example. Set the Service Port to HTTPS, port 443. Click Finished at the bottom Click on the Virtual Server you just created Click Resources Set the Default Pool to kasm_pool, then click Update The Kasm Virtual Server Status should eventually change to Green when the Health Monitor is successful. NOTE: The Virtual Server configuration in this example has been simplified for demonstration purposes. Additional configuration options will be covered later in this article. Kasm Workspaces Configuration The Kasm Workspace will need a Zone configured with the default settings. Login as Admin and check this from Infrastructure > Zones. You will need at least one Workspace. In this example, I have a Workspace with Chrome, Firefox, Terminal and Ubuntu Jammy Click the WORKSPACES Tab at the top of the screen to see what the Workspace looks like Your view should look like this: Test Kasm Workspaces Login as a User NOTE: The IP Address used to connect to the Kasm Workspaces through the BIG-IP is the Virtual Server listening IP Address 10.1.10.100 When the Workspace loads, click Firefox Choose the option to Launch Session in a new Tab After a moment, Firefox will load Here you can see the F5.com website displayed NOTE: The browser pop-up blocker can prevent the Kasm Workspace applications from successfully launching. You can disable the pop-up blocker or create an exception for the BIG-IP Virtual IP (10.1.10.100). Enable SSL Decryption Enabling SSL Decryption allows you to fully inspect the requests and payloads passing through BIG-IP. From Local Traffic > Virtual Servers > click Virtual Server List Then click the name of your Virtual Server, “vs_kasm” in this example In the Configuration section, set the Protocol Profile (Client) to http Set the SSL Profile (Client) to clientssl Set the SSL Profile (Server) to serverssl NOTE: If you have created your own Client and Server SSL Profiles, you should add them here. The instructions above are for demonstration purposes only. Scroll to the bottom and click Update You’re done! Conclusion F5 BIG-IP Zero Trust Access is a key asset to securing containerized platforms like KASM Workspaces. In this article, you learned how to secure your Kasm Workspace using F5 BIG-IP Zero Trust Access. Related Content How I did it - “Delivering Kasm Workspaces three ways” Download Kasm Workspaces Kasm Documentation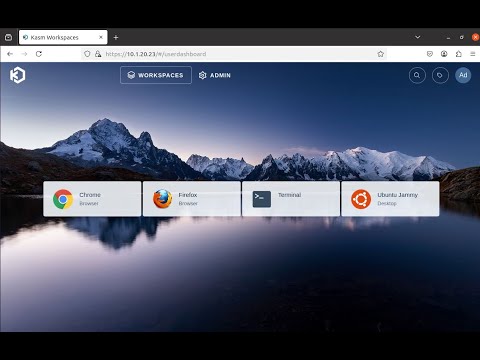 302Views2likes0Comments
Layered ASM for APM login page protection
Has anyone successfully implemented https://my.f5.com/manage/s/article/K000149701 Full VPN clinets stop working after this implementation. I can see below errors Client machines interface IPs are not falling under a private subnet or exception subnet ranges provided by the APM server The connected network is vulnerable of tunnel crack as LocalIP falls under the public IPs110Views0likes1Comment
Recommendation for Adv. Lab
Hi Everyone, I'm relatively new to F5 BIG-IP and want to improve my hands-on skills. I have a chance to build a good lab, but I'm struggling to find real-world use cases and troubleshooting scenarios. Currently, I can only run basic tests with DVWA, but I want to simulate a complex environment. Could you recommend any resources (videos, docs, or lab guides or anything can help) specifically for LTM, AWAF, DNS and APM, use-case scenarios, troubleshooting exercises, architectures etc. Any guidance to help me bridge the gap between basic setup and professional practice would be greatly appreciated. Thanks in advance!457Views0likes8CommentsUpdate an ASM Policy Template via REST-API - the reverse engineering way
I always want to automate as many tasks as possible. I have already a pipeline to import ASM policy templates. Today I had the demand to update this base policies. Simply overwriting the template with the import tasks does not work. I got the error message "The policy template ax-f5-waf-jump-start-template already exists.". Ok, I need an overwrite tasks. Searching around does not provide me a solution, not even a solution that does not work. Simply nothing, my google-foo have deserted me. Quick chat with an AI, gives me a solution that was hallucinated. The AI answer would be funny if it weren't so sad. I had no hope that AI could solve this problem for me and it was confirmed, again. I was configuring Linux systems before the internet was widely available. Let's dig us in the internals of the F5 REST API implementation and solve the problem on my own. I took a valid payload and removed a required parameter, "name" in this case. The error response changes, this is always a good signal in this stage of experimenting. The error response was "Failed Required Fields: Must have at least 1 of (title, name, policyTemplate)". There is also a valid field named "policyTemplate". My first thought: This could be a reference for an existing template to update. I added the "policyTemplate" parameter and assigned it an existing template id. The error message has changed again. It now throws "Can't use string (\"ox91NUGR6mFXBDG4FnQSpQ\") as a HASH ref while \"strict refs\" in use at /usr/local/share/perl5/F5/ASMConfig/Entity/Base.pm line 888.". An perl error that is readable and the perl file is in plain text available. Looking at the file at line 888: The Perl code looks for an "id" field as property of the "policyTemplate" parameter. Changing the payload again and added the id property. And wow that was easy, it works and the template was updated. Final the payload for people who do not want to do reverse engineering. Update POST following payload to /mgmt/tm/asm/tasks/import-policy-template to update an ASM policy template: { "filename": "<username>~<filename>", "policyTemplate": { "id": "ox91NUGR6mFXBDG4FnQSpQ" } } Create POST following payload /mgmt/tm/asm/tasks/import-policy-template to create an ASM policy template: { "name": "<name>", "filename": "<username>~<filename>" } Hint: You must upload the template before to /var/config/rest/downloads/<username>~<filename>". Conclusion Documentation is sometimes overrated if you can read Perl. Missed I the API documentation for this endpoint and it was just a exercise for me?506Views2likes8CommentsF5 BIG-IP Zero Trust Access
Introduction F5 BIG-IP Zero Trust Access, a key component of the F5 Application Delivery and Security Platform (ADSP), helps teams secure apps that are spread across hybrid, multi-cloud and AI environments. In this article, I’ll highlight some of the key features and use cases addressed by BIG-IP Zero Trust Access. F5 BIG-IP Zero Trust Access improves security and the user experience while managing access to your portfolio of corporate applications. Demo Video What is Zero Trust? Key Zero Trust Concepts Zero Trust is a cybersecurity framework built on the following core concepts: Never Trust Similar to human concepts that trust is not given freely, it is earned Always Verify Authenticate and authorize based on all available data points Continuously Monitor Zero Trust is an ongoing security framework that requires monitoring F5 enables zero-trust architectures that optimize your investments and extend zero-trust security across your entire portfolio. Why is this important? Securing apps is complex because apps are spread across a hybrid, multi-cloud environment. Apps themselves have become hybrid in nature, too. This creates 2 problems: Legacy and custom applications can complicate access security. Apps residing anywhere increases the attack surface. F5 BIG-IP Zero Trust Access secures hybrid application access. Securely managing access to corporate applications is critical to preventing data breaches. Doing it well can also increase efficiencies in business processes and user productivity. A Zero Trust security model can deliver this business value by enabling users to seamlessly and securely access their applications from anywhere regardless of where the application resides. In today’s world of hybrid, multicloud and AI applications, Zero Trust is a must. Application access control is key to any Zero Trust architecture. How does F5 address Zero Trust? F5 Zero Trust Begins with Secure Access to All Apps. The F5 Application Delivery and Security Platform (ADSP) is the foundation for Zero Trust Architectures. F5 ADSP delivers visibility, enforcement, and intelligence where it matters most: the application layer. While there are many important components to Zero Trust, we will be focusing on Zero Trust Application Access: Identity-Aware Proxy - Secure access to apps with a fine-grained approach to user authentication and authorization that enables only per-request context- and identity-aware access. Single Sign-On (SSO) and Access Federation - Integrating with existing SSO and identity federation solutions, users can access all their business apps via a single login, regardless of if the app is SAML enabled or not. OAuth 2.0 and OIDC Support - Enable social login to simplify access authorization from trusted third-party identity providers like Google, LinkedIn, Okta, Azure AD, and others. Identity Aware Proxy (IAP) – A Key Component of Zero Trust Use the Guided Configuration to configure the Identity Aware Proxy. From the BIG-IP UI, go to Access > Guided Configuration > Zero Trust. Select the Identity Aware Proxy You will see a configuration example of Identity Aware Proxy Click Next at the bottom For the Config Properties, give it a name, “IAP_DEMO” in this example Set the below options to On Click Save & Next Enable the F5 Client Posture Check Select your CA Trust Certificate Click Add Give it a Name, “FW_Check” in this example Under Windows, select Firewall and Domain Managed Devices Enter your domain name, “f5lab.local” in this example Click Done Click Save & Next Configure the Virtual Server Properties Switch Advanced Settings to On Set the Destination Address, “10.1.10.100” in this example For the Client SSL Profile, select the Client SSL Certificate, Private Key and Trusted Certificate Authorities For the Server SSL Profile, select your Server SSL Certificate and Private Key Click Save & Next Click Add under Authentication Give it a Name, “AD” in this example Set the Authentication Type to “AAA” Set the Authentication Server Type to Active Directory Choose your Authentication Server, “ad-servers” in this example Check the box for Active Directory Query Properties Under Required Attributes, find “memberOf” and click the arrow to move it to Selected Click MFA Click Add Double click Radius Under Choose Radius Server, select Create New Give it a name, “radius_pool” in this example Enter the Server IP Address, “10.1.20.8” in this example Enter the Secret in the two fields Click Save Click Save & Next Click Add Give it a name, “basic_sso” in this example For the SSO Configuration Object, click Create New The Username Source and Password Source should be set like the following Click Save Click Save & Next Under Applications click Add Give it a name, “iap1.acme.com” in this example Under Application Properties, set the FQDN and Caption to “basic.acme.com” Set the Pool IP Address to 10.1.20.7, Port 443, HTTPS Click Save For the Auth Domain, enter “iap1.acme.com” Click Save & Next Set Primary Authentication to “AD” Click Save & Next Click Add under Contextual Access For the Contextual Access Properties, give it a name, “basic.acme.com” in this example Set the Resource to iap1.acme.com Set Device Posture to FW_CHECK Set Single Sign-On to basic_sso Find the Sales Engineering Group and click Add Select the box for Additional Checks Set the Match Action to Step Up Set Step Up Authentication to Custom Radius based Authentication Click Save & Next The Remediation Page must be changed to a real host where users can download and install the EPI updates In this example, it has been changed to “https://iap1.acme.com/epi/downloads” Click Save & Next Click Save & Next Click Deploy Click Finish when the deployment completes Test the functionality by going to a client computer and accessing https://iap1.acme.com Logon with valid credentials You should see a page like the following Click basic.acme.com Login with valid credentials & click Validate You should see the basic.acme.com web page and be already logged in Note: If you disable the Windows Firewall on the client, you should get a block page similar to the following: Conclusion BIG-IP introduces a powerful access experience. BIG-IP provides a variety of Authentication, Federation, SSO and MFA protocols allowing for modern to legacy protocol translation. BIG-IP integrates with 3 rd parties to enforce identity aware decisions. BIG-IP secures identities for any apps and users anywhere in legacy and modern environments, spanning on-prem, hybrid or cloud locations. The highly scalable and proven Access Security solution that F5 customers know and trust. Related Content Zero Trust Solution Overview Secure Corporate Apps with a Zero Trust Security Model BLOG: F5 BIG-IP Zero Trust Access Zero Trust Application Access for Federal Agencies 818Views2likes0Comments
What's new in BIG-IP v21.0?
Introduction In November of 2025 F5 released the latest version of BIG-IP software, v21.0. This release is packed with fixes and new features that enhance the F5 Application Delivery and Security Platform (ADSP). These changes complement the Delivery, Security and Deployment aspects of the ADSP. Demo Video: New SSL Orchestrator Features SNI Preservation SNI (Server Name Indication) Preservation is now supported for Inbound Gateway Mode. This preserves the client’s original SNI information as traffic passes through the reverse proxy, allowing backend TLS servers to access and use this information. This enables accurate application routing and supports security workflows like threat detection and compliance enforcement. Previous software versions required custom iRules to enable this functionality. Note: SNI preservation is enabled by default. However, if you have existing Inbound Gateway Topologies, you must redeploy them for the change to take effect. iRule Control for Service Entry and Return Previously, iRules were only available on the entry (ingress) side, limiting customization to traffic entering the Inspection Service. iRule control is now extended to the return-side traffic of Inspection Services. You can now apply iRules on both sides of an Inspection Service (L2, L3, HTTP). This enhancement provides full control over traffic entering and leaving the Inspection Service, enabling more flexible, powerful, and fine-grained traffic handling. The Services page will now include configuration for iRules on service entry and iRules on service return. A typical use-case for this feature is what we call Header Enrichment. In this case, iRules are used to add headers to the payload before sending it to the Inspection Service. The headers could contain the authenticated username/group membership of the person who initiated the connection. This information can be useful for Inspection Services for either logging, policy enforcement, or both. The benefit of this feature is that the authenticated username/group membership header can be removed from the payload on egress, preventing it from being leaked to origin servers. New Access Policy Manager (APM) Features Expanded Exclusion Support for Locked Client Mode Previously, APM-locked client mode allowed a maximum of 10 exclusions, preventing administrators from adding more than 10 destinations. This limitation has now been removed, and the exclusion list can contain more than 10 entries. OAuth Authorization Server Max Claims Data Support The max claim data size is set to 8kb by default, but a large claim size can lead to excessive memory consumption. You must allocate the right amount of memory dynamically as required based on claims configuration. New Features in BIG-IP v21.0.0 Control Plane Performance and Scalability Improvements The BIG-IP 21.0.0 release introduces significant improvements to the BIG-IP control plane, including better scalability and support for large-scale configurations (up to 1 million objects). This includes MCPD efficiency enhancements and eXtremeDB scale improvements. AI Data Delivery Optimize performance and simplify configuration with new S3 data storage integrations. Use cases include secure ingestion for fine-tuning and batch inference, high-throughput retrieval for RAG and embeddings generation, policy-driven model artifact distribution with observability, and controlled egress with consistent security and compliance. F5 BIG-IP optimizes and secures S3 data ingress and egress for AI workloads. Model Context Protocol (MCP) support for AI traffic Accelerate and scale AI workloads with support for MCP that enables seamless communication between AI models, applications, and data sources. This enhances performance, secures connections, and streamlines deployment for AI workloads. F5 BIG-IP optimizes and secures S3 data ingress and egress for AI workloads. Migrating BIG-IP from Entrust to Alternative Certificate Authorities Entrust is soon to be delisted as a certificate authority by many major browsers. Following a variety of compliance failures with industry standards in recent years, browsers like Google Chrome and Mozilla made their distrust for Entrust certificates public last year. As such, Entrust certificates issued on or after November 12, 2024, are deemed insecure by most browsers. Conclusion Upgrade your BIG-IP to version 21.0 today to take advantage of these fixes and new features that enhance the F5 Application Delivery and Security Platform (ADSP). These changes complement the Delivery, Security and Deployment aspects of the ADSP. Related Content SSL Orchestrator Release Notes BIG-IP Release Notes BLOG F5 BIG-IP v21.0: Control plane, AI data delivery and security enhancements Press Release F5 launches BIG-IP v21.0 Introduction to BIG-IP SSL Orchestrator 1.5KViews3likes0Comments
APM Policy loses POST request content when forwarding across multiple domains.
We have a problem like this, the AAA domain looks at the external side, we forward the requests from the outside to a virtual server located in the CCC internal domain as a policy base. We are authenticating with an apm policy with an internal server multidomain, but we lose the content of the incoming post request while forwarding. Of course, while the POST request is forwarded, GET returns, it catches it and POST is translated. However, the content disappears in the meantime. Is anyone having this problem?60Views0likes0Comments