Configuring Smart Card Authentication to the BIG-IP Traffic Management User Interface (TMUI) using F5's Privileged User Access Solution
As promised in my last article which discussed configuring the BIG-IP as an SSH Jump Server using smart card authentication, I wanted to continue the discussion of F5's privileged user access with additional use cases. The first follow on article is really dedicated to all those customers who ask, "how do I use a smart card to authenticate to the BIG-IP TMUI?" While yes, I did provide a guide on how to do this natively, I'm here to tell you I think this is a bit easier but don't take my word for it. Try them both!
To reduce duplicating content, I am going to begin with the final configuration deployed in the previous article which has been published at https://devcentral.f5.com/s/articles/configuring-the-big-ip-as-an-ssh-jump-server-using-smart-card-authentication-and-webssh-client-31586. If you have not completed that guide, please do so prior to continuing with the Traffic Management User Interface (TMUI). With that, let's begin.
Prerequisites
- LTM Licensed and Provisioned
- APM Licensed and Provisioned
- iRulesLX Provisioned
- 8Gb of Memory
- Completed the PUA deployment based on my previous guide.
https://devcentral.f5.com/s/articles/configuring-the-big-ip-as-an-ssh-jump-server-using-smart-card-authentication-and-webssh-client-31586
Create a Virtual Server and BIG-IP Pool
Now you may be asking yourself why would I need this? Well, if any of you have attempted this in the past you will notice you will receive an ACL error when trying to access the management IP directly from a portal access resource. Because of this, we will need to complete this step and point our portal access resource to the IP of our virtual server.
- Navigate to Local Traffic >> Virtual Servers >> Click Create
- Name: BIG-IPMgmtInt
- Destination Address: This IP is arbitrary, select anything
- Service Port: 443
- SSL Profile (Client): clientssl
- SSL Profile (Server): serverssl
- Source Address Translation: Automap
- Scroll until you reach the Default Pool option and click the + button to create a new pool.
- Name: BIG-IP
- Health Monitors: HTTP
- Address: Management IP address
- Service Port: 443
- Click Add and Finished
- The pool should be selected for you after creation.
- Click Finished
Creating a Single Sign On Profile for TMUI
- Navigate to Access >> Single Sign On >> Forms Based >> Click Create
- Name: f5mgmtgui_SSO
- SSO Template: None
- Headers Name: Referer
- Headers Value: https://IPofBIGIPVS/tmui/login.jsp
- Username Source: session.logon.last.username
- Password Source: session.custom.ephemeral.last.password
- Start URI: /tmui/login.jsp
- Form Action: /tmui/logmein.html
- Form Parameter For User Name: username
- Form Parameter For Password: passwd
- Click Finished
Creating a Portal Access List and Resource
- Navigate to Access >> Connectivity / VPN >> Portal Access >> Portal Access Lists >> Click Create
- Name: BIG-IPMgmtIntPA
- Link Type: Application URI
- Application URI: https://IPofBIGIPVS/tmui/login.jsp
- Click Create
- After the Portal Access List is created, click the Add button in to add a resource.
- Link Type: Paths
- Destination Type: IP
- Destination IP Address: IP of the BIGIP virtual server
- Paths: /*
- Scheme: https
- Port: 443
- SSO Configuration: Select the SSO profile created previously in this article
- Click Finished
Assign the new Portal Access Resource
- Navigate to Access >> Profiles / Policies >> Click the Edit button in the row of the PUA Policy created using the previous guide.
- From the Admin Access Macro click Advanced Resource Assign
- Click the Add / Delete Button from the Resource Assignment page.
- Select the Portal Access tab and place a check mark next to the portal access resource created in the previous steps.
- Click Update
- Click Apply Access Policy
Validation Testing
- From a web browser navigate to webtop.demo.lab.
- Click OK, Proceed to Application
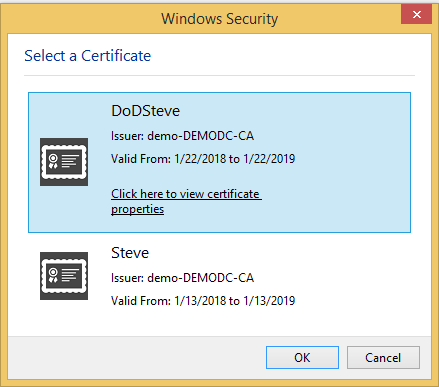
- Select your user certificate when prompted and click OK
- From the Webtop, select the portal access resource you created in previous steps.
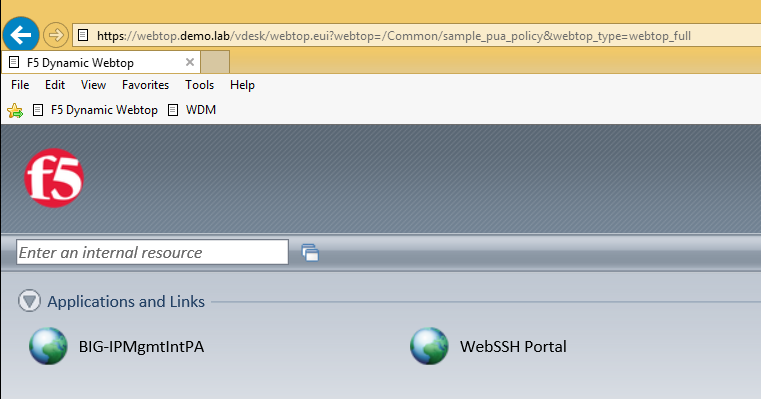
- If successful, you will be redirected to the BIG-IP TMUI as shown below.
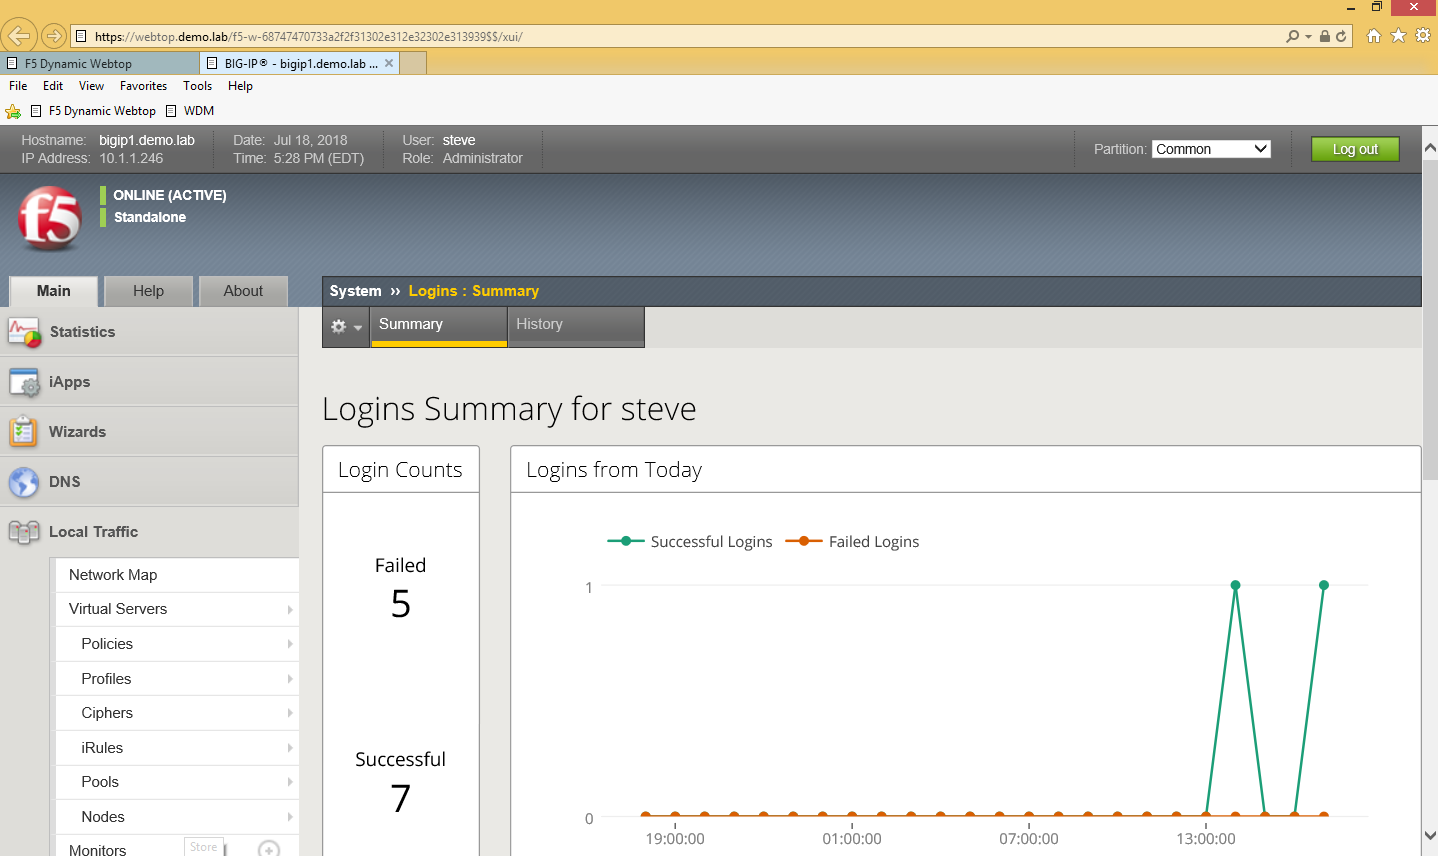
Now you have successfully configured SSO to the BIG-IP TMUI using forms based authentication. I'm sure many of you are wondering how it is possible to perform forms based authentication when I provided no password in this entire article. This is possible because of the ability for the F5 PUA solution to generate a one-time password on behalf of the user and present it to the application. Thanks for following and I will continue with additional use cases and capabilities of the F5 BIG-IP.
Appendix
If for any reason you attempt to logout of TMUI and are logged back in immediately, it is likely because of middle ware you have in place on your workstation though no need to worry, there's an iRule for that! Simply add the following iRule to the Webtop virtual server and you will be good to go.
when HTTP_REQUEST { #log local0. "[HTTP::uri]" switch -glob [HTTP::uri] { "*/tmui/logout.html" { HTTP::respond 200 content "Logged Out. Close Browser." } default { } }
}
6 Comments
Hi Steve
I've been looking at the authentication logic and was wondering if you could help me out understand it a little bit better.
I can see the iRules creates a subtable with hashed credential information but I don't seem to be able to find where that information is lookup, can you point me in the right direction?
 Steve_LyonsRet. Employee
So, I may not fully understand your question but I will try and at least shed some more light.
- Upon successful auth; creates user/random password (session.custom.ephemeral.last.password)
- sets login.last.user/pass to ephemeral user/pass for SSO
- User credentials sent via SSO to application
- App sends LDAP bindRequest to authentication user
- bindRequest intercepted from LDAP server
- User looked up in table, password is compared
- Auth result is sent back to application
- Any "non-bindRequests" are passed through to real LDAP server (searches, group memberships, etc...)
- bindRequests for DNs specified in "LDAP_Bypass" go directly to the LDAP server and are not intercepted.
The password is stored as a session variable which can be seen below.
within the ephemeral_config DG is where you can configure additional requirements for your OTP. password complexity rules variables
pwrulesLen - integer - optional - Password Complexity, minimum password length/characters. Example 8 (default) pwrulesUpCaseMin - integer - optional - Password Complexity, minimum upper case characters. Example 1 (default) pwrulesLwrCaseMin - integer - optional - Password Complexity, minimum lower case characters. Example 1 (default) pwrulesNumbersMin - integer - optional - Password Complexity, minimum numeric characters. Example 1 (default) pwrulesPunctuationMin - integer - optional - Password Complexity, minimum punctuation/special characters. Example 1 (default)- Steve_LyonsRet. Employee
Were you able to successfully deploy the solution using this guide?
Aaah nice. I didn't realize that the ldap proxy only intercepted relevant requests.
Back to my question. I think I understand it now, you transfer the ephemeral password to a session variable which is used in the SSO.
I haven't tried to implement it yet but I'm sure your guide will make it quite easy for me to do though it is in a nice package.
I like to know a little about the logic before I use it as it is a rather complex solution and troubleshooting it would not be easy, that and that I'm not strong in iLX. I might dissect it and use parts of it as it enables some crazy implementations options. And no competitor can do anything like this (not even close!) so a presales setup would make sense.
If this functionality could be baked into the product I would prefer that, the solution has many moving parts. Maybe a iAppLX package could do it?
Anyway thanks for the elaboration of the implementation.
 npmaslow_68104Historic F5 Account
This appears to mostly work right off the bat - assuming you have a PUA iRulesLX environment working already. The main problem I have is that it drops the user to an 'Authentication Required' screen initially but if they click on the IP link to essentially refresh the page, then the GUI displays.
- kaiser_jericho
Nimbostratus
Why you didn't apply the access policy you created in the Virtual Server?
Will this solution be applicable for SSO of Multiple BigIP TMUI using Remote LDAP Authentication for username and password?

Help guide the future of your DevCentral Community!
What tools do you use to collaborate? (1min - anonymous)