security
3273 TopicsPKI Today 2026: Congratulations, Your Cert Renewal Is Now a Recurring Calendar Invite
398 days to 47 reads like a number change. Means nothing to management right? It's a workflow change. The cert(s) we touch once a year becomes the cert we touch every six weeks, multiplied by the entire inventory just built. The schedule is fixed, it is public, and it's not a rumor. The CA/Browser Forum passed Ballot SC-081v3 in April 2025, and it steps the maximum lifetime of a publicly trusted TLS certificate down: from 398 days, 200 days as of March 15, 2026, 100 days as of March 15, 2027, and 47 days as of March 15, 2029 [1]. Each step roughly halves the one before it. Certificates already issued keep their original lifetime, so nothing breaks overnight; the squeeze arrives at renewal, which is where most of your inventory meets the new rules whether it's ready or not. The math is the part that reframes it from policy to operations. An organization running a thousand public certificates handles on the order of a thousand renewals a year today. At a 47-day lifetime, those same thousand certificates generate nearly eight thousand renewal events a year, because each one now turns over roughly eight times instead of once [2]. That is the eight-fold figure sitting behind the opening line, and it's why "we'll add headcount" isn't an answer. You don't staff your way out of an eight-fold increase in a recurring administrative operation that requires a modicum of due diligence. You automate it, or you start having outages. This isn't hypothetical. Missed renewals already take down major infrastructures more than we sometimes want to admit: Microsoft Teams, February 2020: an expired authentication certificate locked users out of Teams globally for roughly three hours after the company reported that users may be unable to access Microsoft Teams and later confirmed the outage was due to an expired certificate (TechCrunch) Ericsson SGSN-MME, December 2018: an expired software certificate in Ericsson's core network software shut down affected equipment, knocking out mobile data and voice for roughly 32 million O2 customers in the UK and tens of millions of SoftBank customers in Japan (Softpedia) Logitech certificate, January 2026: an expired code-signing certificate broke Logitech's macOS apps system-wide, a fresh reminder that renewal failures aren't a 2018-2020 relic (MacRumors) Three different failure modes, one common thread: none of these companies lacked the engineering talent to prevent an expiration date from arriving unnoticed. They lacked the automation, or monitoring, or inventory, or any combination of the three. The 2027 Cliff Here is the part the headlines seem to miss: the cliff is 2027, not 2029. The 200-day phase that arrived in 2026 still survives a semi-manual process, because renewing twice a year is annoying but livable. The 100-day phase in March 2027 is where it breaks for most organizations, because quarterly-plus renewal across a production inventory is past the point where people clicking buttons can keep pace. By the time 47 days lands in 2029, any team that is going to make it has already automated. If 2029 is the coup de grâce, then 2027 is the wound, and "it's just a flesh wound" is not a migration strategy. Plan for the 2027 date and the 2029 one mostly takes care of itself. Validity, meanwhile, is only the number everyone watches. The one that actually reshapes your tooling is domain control validation reuse, which steps down on its own track: 398 days, now 200, soon 100, and finally 10 days in the last phase [1]. At a 47-day certificate with a 10-day reuse window, you are re-proving control of each domain something like three dozen times a year. Email-based validation and a human dropping a file on a server are finished at that cadence; they were never meant to run weekly. Worse, validation is getting more rigorous at the same time as it gets more frequent: the Forum now requires corroborating domain validation from multiple network perspectives, and DNSSEC validation where present is effective alongside the first phase in March 2026 [3]. The operation you now run thirty-odd times a year is also harder to run each time. There is no shortcut hiding in the effort. The Escape Hatch There is, however, an escape hatch. In October 2025 the Forum added a new domain control validation method, section 3.2.2.4.22, "DNS TXT Record with Persistent Value," informally the DNS-PERSIST-01 method [4], with a matching ACME challenge moving through the IETF as dns-persist-01 [5]. The idea is a set-once and reap the benefits over time: we place a single persistent TXT record naming the CA and our account, and the CA reuses it across issuances instead of making us rewrite DNS on every renewal. Read the fine print, though, because it's easy to oversell. The persistent record doesn't exempt you from the 10-day reuse cap; the CA still re-checks the record at each issuance and still may only rely on it for those ten days. What it removes is the per-renewal DNS write, not the re-validation. For shops with strict DNS change-management, for multi-tenant and edge platforms, and for IoT fleets that can't coordinate real-time DNS updates, it can be the difference between feasible and ITIL change control revolt; it's a workflow simplification, not a loophole. Add it up and the conclusion isn't so subtle. At this cadence automation stops being a nice-to-have and becomes the only way to stay out of an asylum. But "just automate it" quietly assumes one thing that falls apart fast: that a single CA can issue everything you need. And that's what we discuss next. References [1] CA/Browser Forum. Ballot SC-081v3, "Introduce Schedule of Reducing Validity and Data Reuse Periods" (passed April 2025). Maximum TLS validity 398 to 200 (15 Mar 2026), 100 (15 Mar 2027), 47 (15 Mar 2029); DCV reuse 398 to 200, 100, then 10 days; Subject Identity Information reuse 825 to 398 days as of 15 Mar 2026. [2] DigiCert. "TLS Certificate Lifetimes Will Officially Reduce to 47 Days" (2025 [3] CA/Browser Forum. Ballot SC-067v3 (Multi-Perspective Issuance Corroboration) and Ballot SC-085v2 (Require Validation of DNSSEC when present for CAA and DCV lookups) [4] CA/Browser Forum. Ballot SC-088v3, "DNS TXT Record with Persistent Value DCV Method [5] IETF draft-ietf-acme-dns-persist, ACME challenge "dns-persist-01" for persistent DNS TXT record validation (working-group draft, rev -01, 2026).63Views3likes1CommentWhat’s new in F5 Insight for ADSP v1.2.2?
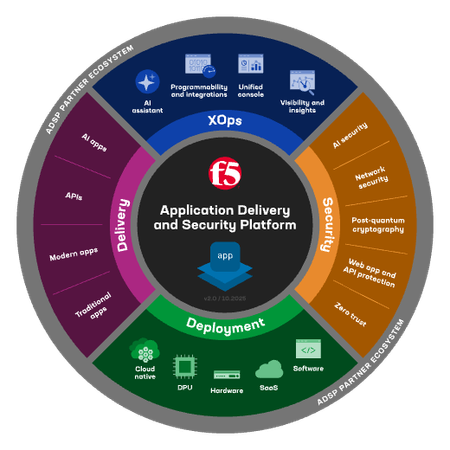
Introduction We’re pleased to announce the release of F5 Insight for ADSP v1.2.2. This release focuses on expanding software lifecycle management capabilities, bolstering installation durability, and giving administrators real-time control across complex environments. F5 Insight for ADSP, a key component of the F5 Application Delivery and Security Platform (ADSP), helps teams monitor and secure apps that are spread across hybrid, multi-cloud and AI environments. We’re pleased to announce the release of F5 Insight for ADSP v1.2.2. This release focuses on expanding software lifecycle management capabilities, bolstering installation durability, and giving administrators real-time control across complex environments. Key highlights include added support for TMOS Engineering Hotfixes, added support for F5OS-A / F5OS 2.0 update and patching workflows, and expanded Standalone/Bulk installation flexibility. Key Highlights Support for BIG-IP (TMOS) Engineering Hotfixes F5 Insight v1.2.2 now supports updating BIG-IP software to Engineering Hotfix versions. You can distribute and install Engineering Hotfix software to your BIG-IP directly from within F5 Insight. Readiness checks, distribution logic, and installation support for TMOS Engineering Hotfixes are now supported. This enables seamless deployment of specialized patches directly through F5 Insight. Support for F5OS-A / F5OS 2.0 F5 Insight v1.2.2 now supports the installation of F5OS-A / F5OS 2.0 software patches and updates. (Major and Minor version upgrades are not yet supported). You can patch/update F5OS-A / F5OS 2.0 directly from within F5 Insight. F5OS-specific readiness checks are performed before and after installation to ensure a smooth update experience. The following are checked prior to and after an upgrade: cluster firmware_status fpga_status cores tenant_status service_pods. Warnings and blocking events will be displayed directly within the Insight UI. The setup progress will display the status of the update with messages like the following: "Upgrading Firmware..." Expanded "Standalone / Bulk" Software Installations F5 Insight version 1.2.2 updates the "Standalone" job type to a "Standalone / Bulk" type. These jobs can now be executed across target devices regardless of HA state (Active, Standby, or Standalone), surfacing helpful warnings when HA pair instances are selected while still allowing manual operator management. At the end of the day, this allows administrators the flexibility to: upgrade 20 Standby devices in one job, then manage failover independently, and then have another job to upgrade the now-Standby 20 devices. This wasn’t possible in v1.2.1 and prior. Picking the Standalone/Bulk Job Type: Warning & Tooltip when Active or Standby instances are in the ‘Standalone/Bulk’ job type: Warning that must be acknowledged before the user can click the ‘Execute Job’ button: Real-Time Instance Metadata Refresh Adds a "Refresh" button on the instance table in the Software Installation job drawer. Admins can refresh real-time metadata (Instance Name, Active Volume, Target Volume, and HA state) before running patches or installations, ensuring that the instance details are current. FQDN Support for LDAP and SAML Identity Providers F5 Insight uses an external URL for LDAP and SAML authentication. By default, it uses the appliance IP address in these redirect URLs. If users access F5 Insight through a fully qualified domain name (FQDN), you should configure that FQDN as the external URL so that login redirects and callback URLs match the address in the browser. In F5 Insight v1.2.2, you can configure the external FQDN through the UI or the REST API. The CLI script f5insight-set-fqdn is also available as a fallback option. Using an FQDN is recommended for: TLS certificate hostname validation. Better user experience (friendly login URLs). Stable identity across IP changes. Custom CA Certificates for LDAP/LDAPS Authentication F5 Insight v1.2.2 supports custom Certificate Authority (CA) certificates to secure LDAP authentication. As an administrator, you can: Upload a CA certificate or CA bundle to the Trust Store. Select the uploaded CA when you configure an LDAP identity provider. Validate the LDAP server certificate for LDAPS connections using the selected CA. Conclusion F5 Insight for ADSP v1.2.2 accelerates threat remediation workflows and minimizes upgrade risks across BIG-IP and F5OS environments. By combining automated pre-and post-installation readiness checks with targeted TMOS hotfix support, real-time volume metadata verification, and flexible bulk execution, operations teams can confidently deploy updates, eliminate configuration drift, and maintain uptime during critical maintenance windows. Upgrade today to the latest version of F5 Insight for ADSP and enjoy the following benefits: Support for TMOS Engineering Hotfixes Support for F5OS-A / F5OS 2.0 with specific pre/post readiness checks Expanded Standalone/Bulk software installation flexibility FQDN Support for LDAP and SAML Identity Providers Custom CA Certificates for LDAP/LDAPS Authentication Related Content F5 Insight v1.2.2 Release Notes and Security Updates F5 Insight Documentation F5 Insight for ADSP – Initial Setup in VMware F5 Insight for ADSP - A Closer Look F5 Insight Product Page63Views2likes0CommentsLeverage F5 XC AI Powered WAF to Challenge Frontier AI Models
This article expands on F5’s blog post regarding CVE-2026-42208 Leveraging AI to Challenge Frontier AI Models Unlocking the full capabilities of your F5 Distributed Cloud (XC) WAF requires moving beyond static signatures. In this technical walkthrough, we explore how AI-driven behavioral analysis dynamically scores risk to maximize protection and minimize false positives. The Shrinking Time-to-Exploit Threat actors are increasingly utilizing AI to automate vulnerability discovery and weaponization. As a result, the Mean Time to Exploit (MTTE) is rapidly collapsing. While the average enterprise requires 20 days to test and deploy a patch, exploits are now weaponized within hours—pushing the industry toward a reality of "negative-day" vulnerabilities, where exploits are active before a CVE is even publicly disclosed. Relying purely on reactive patching is no longer a viable security posture. Moving Beyond Static Signatures Traditional Web Application Firewalls (WAFs) provide a critical first line of defense using static signature matching. However, against highly evasive threats, this creates a balancing act: setting signature thresholds too high allows novel exploits to bypass the WAF, while setting them too low results in unacceptable false-positive rates. F5 XC addresses this with an AI-powered Risk Scoring engine that evaluates requests dynamically, correlating signature analysis, behavioral indicators, and Machine Learning (ML)-based classification to assign a predictive risk score. Test Environment Architecture To demonstrate this capability, we engineered a test environment targeting a modern AI application stack to showcase the F5 XC WAF's ability to protect the environment against a recently announced vulnerability (CVE-2026-42208). We subjected this environment to both legitimate chatbot prompts and malicious SQLi payloads across three distinct WAF configurations. Infrastructure A Kubernetes cluster hosting a vulnerable iteration of LiteLLM, a PostgreSQL database, and an Ollama pod as the backend LLM. Routing & Security All ingress traffic is routed through an F5 XC Load Balancer with WAF enabled. The Exploit LiteLLM is an open-source proxy that provides a single interface to over 100 large language models. It sits at the center of enterprise AI pipelines, concentrating provider API keys, virtual keys, master keys, and PostgreSQL connection strings in one database. CVE-2026-42208 (CVSS 9.3) affects versions 1.81.16 through 1.83.6 of BerriAI LiteLLM, allowing unauthenticated attackers to inject SQL via a crafted Authorization: Bearer header, because LiteLLM concatenates raw tokens directly into its queries. When crafted carefully, this payload avoids conventional injection patterns. Because traditional WAFs often overlook the high-entropy values inside authorization headers to avoid false positives, this vector can easily bypass static, rule-based WAF detection. A look at the backend Postgres logs reveals exactly how this payload takes root. As shown in the log capture below, the attacker is able to terminate the intended query and inject a malicious SELECT statement, allowing them to interact with the database without requiring the authorization to do so. As you will see, this can lead to the exfiltration of secrets directly from the database. Deep Dive: Evaluating the Test Traffic Profiles To understand how the AI-Powered WAF augments the foundational defenses of a traditional WAF, we must first define the two types of traffic we are sending to the application: The Malicious Request (True Positive) A threat actor crafts a request where the Authorization: Bearer token contains SQL syntax designed to break out of LiteLLM’s token concatenation (e.g., inserting '; SELECT * FROM ... --'). This payload is specifically engineered to only trigger low-accuracy WAF signatures to evade standard enterprise defenses. Example: curl https://litellm.cr1.2e84.cyber-range.f5.com/chat/completions \ -H "Content-Type: application/json" \ -H "Authorization: Bearer ' ${SQL_INJECTION}" \ -d "{\"model\": \"mistral\", \"max_tokens\": 1, \"messages\": [{\"role\": \"user\", \"content\": \"'any string will do!\"}]}" The Benign Request (False Positive Mitigation) A legitimate user sends a natural language programming question to the AI backend. The JSON payload contains conversational strings that mimic attack vectors (e.g., “Can you show me how to SELECT data and DROP a table?”). Example: curl https://litellm.cr1.2e84.cyber-range.f5.com/chat/completions \ -H "Content-Type: application/json" \ -H "Authorization: Bearer ${VALID_TOKEN}" \ -d "{\"model\": \"mistral\", \"max_tokens\": 1, \"messages\": [{\"role\": \"user\", \"content\": \"'SELECT tokens > 500 or tokens > ethereum and IS NOT NULL--\"}]}" WAF Configuration Testing With our traffic profiles established, let’s observe how the F5 XC WAF processes these exact requests across three distinct configurations. Scenario 1: Default WAF Configuration In the default configuration, the WAF is set to evaluate only High and Medium accuracy signatures. Since I have crafted SQL injection attacks that would only trigger low accuracy WAF signatures, no WAF signatures were triggered, thus no security logs exist for this attack. This is the same for the benign requests. 🔴 The Malicious Request: Because the malicious SQL injection was specifically crafted to trigger only low-accuracy signatures, it bypasses the WAF completely. No security logs are generated, and the database is compromised. 🟢 The Benign Request: The benign request also passes through without issue. Scenario 2: Low Accuracy Signatures (The False Positive Trap) To catch the exploit, we increase the WAF’s sensitivity by enabling Low Accuracy signature detection. 🟢 The Malicious Request: The static signature engine successfully detects the low-accuracy SQLi signature and blocks the attack as expected. As you can see, the static signature engine scans the request and flags the anomaly using low accuracy SQL injection signatures. 🔴 The Benign Request: Unfortunately, the WAF also triggers on the conversational SQL keywords in the legitimate prompt and blocks the user. If we look at the detection logs, the AI engine running in the background actually tagged this request as a likely “False positive.” However, because we have not yet opted to enhance the WAF’s enforcement with AI, the strict signature rule prioritizes safety and dictates a block, which unfortunately impacts the legitimate user. Scenario 3: AI-Enhanced Risk Scoring For our final test, we keep Low Accuracy signatures enabled but toggle on the “Enhanced with AI” setting. 🟢 The Malicious Request: The WAF correctly blocks the exploit. Although the results of this configuration look the same to the end user, instead of blocking instantly, the AI-Enabled Risk Scoring engine evaluates the request context. Under the hood, the AI evaluates the request context, correlates the triggered signature with malicious structural indicators in the Authorization header, and calculates a High Risk Score of 90. Because this exceeds the default mitigation threshold, the attack is stopped. The logs look almost identical to those in scenario 2, but even though the logs for scenario 2 also showed the AI evaluation and score, that data was not taken into account to determine if the requests should be blocked. 🟢 The Benign Request: Here is where the AI unlocks the power of low-accuracy signatures. When the static engine flags the user’s prompt, the AI Risk Scoring engine analyzes the broader context—recognizing that the SQL keywords are safely embedded within a conversational sentence. It assigns a Low Risk Score of 7. Because a score of 7 is below the threat threshold, the AI dynamically overrides the signature match and logs an “allow” action, letting the traffic pass cleanly to the backend. With the WAF enhanced by AI, negative-day attacks like this are blocked decisively without causing any service disruption to legitimate customers. The Operational Value: Reducing Security Friction By shifting the decision-making process from static signature rules to dynamic risk calculation, F5 Distributed Cloud solves two major enterprise security headaches: Security Challenge Traditional Signature WAF F5 AI-Powered WAF Low Accuracy Signatures Often kept disabled to prevent high false-positive rates, which can leave the app exposed to highly evasive exploits. Enabled safely. The AI acts as a safeguard to filter out false alarms. Operational Overhead Demands continuous manual tuning and exception management to maintain accuracy. No manual tuning required. The WAF dynamically determines intent and self-corrects in real-time. For additional details on AI-Enabled Risk Scoring, see AI-Enabled Risk Scoring Helps Reduce Risks. Demo To see this mitigation in action, watch our step-by-step video demonstration: Conclusion When combating automated, negative-day exploits, relying solely on traditional signature matching requires a delicate balancing act: risk letting an evasive threat slide by, or risk blocking legitimate users. By integrating AI Risk Scoring, the F5 Distributed Cloud WAF helps navigate this balance dynamically. By dynamically analyzing context and separating legitimate traffic from anomalous behavior in real-time, organizations can achieve maximum threat mitigation with near-zero false positives—drastically reducing the administrative burden of manual WAF tuning. References & Further Reading For more information on Risk Based Scoring, see: Implementing Risk-Based Actions with AI-Powered WAF: Customer Policy Paths AI-Enabled Risk Scoring Helps Reduce Risks For more information on F5 AI-Powered WAF, see: Securing web apps without complexity: How F5’s AI-powered WAF transforms WAF security AI Powered Risk Scoring For more information on the LiteLLM vulnerability demonstrated in this article, see: LiteLLM has SQL Injection in Proxy API key verification CVE-2026-42208: Targeted SQL injection against LiteLLM's authentication path discovered 36 hours following vulnerability disclosure OWASP: Blind SQL Injection 113Views1like0Comments
Observing F5 BIG-IP CNE CNFs - V2 Metrics Aggregation walkthrough
Introduction Cloud-native distribution solves scale and resilience, but it fragments visibility. When TMM pods run across multiple Kubernetes nodes, logs and metrics scatter with them. The observer pod exists to pull that telemetry back into a single, coherent view. In a CNF deployment, multiple TMM pods run across Kubernetes nodes, each handling separate traffic slices. A coherent view of the entire dataplane requires aggregating those per-pod statistics. CNFs generate stats at high frequency across all TMM pods. Without aggregation, per-pod metric streams multiply quickly and do not compose cleanly into useful dashboard or alerting data. if you upgraded recently to CNF2.2+ you may have encountered new metrics behavior where, that's what we are covering here how V2 metrics change the metric collection and troubleshooting behavior. TODA Architecture: Four Components TODA (Telemetry, Observability, Diagnostics, and Analytics) is the stats collection and aggregation layer for CNFs. The distributed model has four roles: Component Description TMM Scraper Sidecar container in each TMM pod. Replaces tmstatsd. Serves metrics from tmctl over a gRPC response stream when requested by a Receiver. Receiver Runs as a StatefulSet. Scrapes metrics from assigned TMM Scrapers, persists them, and forwards to the Observer over gRPC with mutual TLS (mTLS). Handles metrics from terminated TMM pods so cumulative data is not lost mid-scrape. Observer Runs as a StatefulSet. The aggregation engine. Pulls from Receivers, aggregates metrics across all TMMs per table, and exports to the OTEL collector. Emits internal telemetry covering gRPC call metrics, aggregation performance, and storage state. Operator Runs as a Deployment. Orchestrates lifecycle: discovers TMM Scrapers, Receivers, and Observers; load-balances TMMs across Receivers; applies aggregation mode and collection interval settings via a ConfigMap. V1 vs. V2 CNF Metrics Choose before deploying. V1 and V2 use incompatible metric naming in Prometheus, so PromQL queries written for one will not work on the other. V1 (legacy): tmstatsd runs in each TMM pod and streams metrics directly to OTEL with no aggregation. Metric names look like: virtual_server_stat/spk-app-1-spk-app-tcp-8050-f5ing-testapp-virtual-server/clientside.bytes_out Each metric carries a tmmID attribute identifying the source pod. Six TMM pods means six separate data streams for the same virtual server. Dashboards scale poorly. V2 (current): The Receiver and Observer aggregate before export to OTEL. The equivalent metric: f5.virtual_server.clientside.received.bytes Attributes include f5.virtual_server.name, k8s.namespace.name, and observer.job.mode: aggregated. One metric, unified across all TMMs, with naming aligned to OpenTelemetry semantic conventions. Use V2 for new deployments. V1 remains only for environments not yet migrated. Deploying the Observer with Helm Install the Observer in the same namespace as your F5Ingress. Get the chart version from your CNFs software package: cd cnfinstall ls -1 tar | grep observer # f5-toda-observer-v4.56.4-0.0.15.tgz Create an observer_values.yaml. At minimum, set the image registry and storage class: image: repository: your-registry.example.com persistence: storageClassName: '' accessMode: ReadWriteOnce size: 3Gi platformType: robin fluentbit_sidecar: image: repository: your-registry.example.com fluentbit: tls: enabled: true fluentd: host: f5-toda-fluentd.cnf-gateway.svc.cluster.local. Install: helm install observer f5-toda-observer-<VERSION>.tgz -f observer_values.yaml Note: The Operator and Receivers share a volume. If they run on the same node, any StorageClass works. If Receivers are distributed across multiple nodes, use a ReadWriteMany-compatible StorageClass, NFS is the standard choice. In my lab I'm installing to a cne-core namespace instead of default namespace. Also, Make sure to update BIG-IP Controller ingress values, as below f5-tmm: ... ... observer: enabled: true image: repository: local.registry.com f5-toda-logging: enabled: true type: stdout fluentd: host: f5-toda-fluentd.cne-core.svc.cluster.local. tmstats: enabled: false Once updated upgrade your helm installation helm upgrade f5ingress f5ingress-v15.82.0-0.2.50.tgz -f deployment/values-ingress-v2.yaml -n cnf-fw-01 Now, you have all the components ready, you can reference the below steps for additional integrations with Grafana and Prometheus. Lab notes In my lab there are some commands I had to run to adjust to the openshift deployment, helm upgrade observer f5-toda-observer-5.22.10-0.2.4.tgz -n cne-core --reuse-values --set persistence.storageClassName=openebs-hostpath oc adm policy add-scc-to-user hostmount-anyuid -z f5-observer -n cne-core oc adm policy add-scc-to-user hostmount-anyuid -z f5-observer-operator -n cne-core oc adm policy add-scc-to-user hostmount-anyuid -z f5-observer-receiver -n cne-core oc secrets link f5-observer <secret> --for=pull -n cne-core oc secrets link f5-observer-operator <secret> --for=pull -n cne-core oc secrets link f5-observer-receiver <secret> --for=pull -n cne-core Wiring Prometheus and Grafana to CNF Metrics The OTEL collector exposes a Prometheus-compatible endpoint on TCP port 9090. It requires mTLS, so valid certificates must be in place before the scrape job succeeds. Step 1 — Create a Prometheus namespace and certificate: kubectl create namespace prometheus kubectl apply -f prom-certs.yaml # cert-manager Certificate manifest Step 2 — Configure Prometheus to scrape OTEL with TLS: serverFiles: prometheus.yml: scrape_configs: - job_name: bnk-otel scheme: https static_configs: - targets: - otel-collector-svc.default.svc.cluster.local:9090 tls_config: cert_file: /etc/prometheus/certs/tls.crt key_file: /etc/prometheus/certs/tls.key ca_file: /etc/prometheus/certs/ca.crt insecure_skip_verify: false server: extraVolumes: - name: prometheus-tls secret: secretName: prometheus-client-secret extraVolumeMounts: - name: prometheus-tls mountPath: /etc/prometheus/certs readOnly: true global: scrape_interval: 10s service: type: NodePort nodePort: 31929 persistentVolume: enabled: false Step 3 — Deploy via Helm: helm install prometheus oci://ghcr.io/prometheus-community/charts/prometheus \ -n prometheus --atomic -f values.yaml //Update otel config map and change line 47 to following debug: verbosity: detailed //Then add following at the end of the configmap exporters: - otlp - deb Step 4 — Verify the scrape target is healthy: curl http://<node-ip>:31929/api/v1/targets | jq Step 5 — List all CNF metrics currently ingested: curl http://<node-ip>:31929/api/v1/label/__name__/values | jq Step 6 — Run a quick query to validate data is flowing: curl "http://<node-ip>:31929/api/v1/query?query=f5_tmm_f5_pool_member_serverside_connections_count_total" | jq For Grafana, add Prometheus as a data source. F5 provides a pre-built Observer dashboard JSON on CloudDocs. The dashboard has three sections: gRPC metrics — Communication performance between Observer containers: call latency and request counts. Go Runtime metrics — Pod resource consumption: goroutine counts, heap memory, object allocation rates. Storage/Aggregation metrics — How the Observer handles dead TMM pod data. When a TMM pod terminates, the Observer runs merge operations to consolidate its metrics. This section shows whether those operations are healthy. Note, you need to update your OTEL definition to include the below //Update otel config map debug: verbosity: detailed //Then add following at the end of the configmap exporters: - otlp - deb //Apply updated OTEL configmap Once done, proceed to rollout the otel deployment oc rollout restart deployment otel-collector -n cnf-fw-01 oc logs otel-collector-6b5c9d5f89-qccqv -f | grep profile_tcp -> table: Str(profile_tcp_stat) -> table: Str(profile_tcp_stat) -> table: Str(profile_tcp_stat) -> table: Str(profile_tcp_stat) -> table: Str(profile_tcp_stat) -> table: Str(profile_tcp_stat) -> table: Str(profile_tcp_stat) -> table: Str(profile_tcp_stat) -> Name: f5.profile_tcp.accepts -> f5.profile_tcp.name: Str(tmstat_tcp) -> f5.profile_tcp.vs_name: Str(qkview_for_tmstatsd) -> observer.job.name: Str(cnf-fw-01/default-scrape-template-66456f74c4/default-job-profile_tcp_stat) -> Name: f5.profile_tcp.accepts -> f5.profile_tcp.name: Str(_mcptcp) -> f5.profile_tcp.vs_name: Str(grpc_mt_10:2) -> observer.job.name: Str(cnf-fw-01/default-scrape-template-66456f74c4/default-job-profile_tcp_stat) -> Name: f5.profile_tcp.accepts -> f5.profile_tcp.name: Str(_mcptcp) -> f5.profile_tcp.vs_name: Str(grpc_mt_4:0) -> observer.job.name: Str(cnf-fw-01/default-scrape-template-66456f74c4/default-job-profile_tcp_stat) -> Name: f5.profile_tcp.accepts -> f5.profile_tcp.name: Str(_mcptcp) -> f5.profile_tcp.vs_name: Str(_grpc_tmm_listener_9) -> observer.job.name: Str(cnf-fw-01/default-scrape-template-66456f74c4/default-job-profile_tcp_stat) -> Name: f5.profile_tcp.accepts -> f5.profile_tcp.name: Str(_cgctcp_in) Troubleshooting via Metrics V2 Now, we have better capabilities of actually monitoring traffic across multiple pods and TMMs from single location, [cloud-user@ocp-provisioner f5-cne-2.2.0]$ oc exec sts/f5-observer-receiver -n cne-core -- mdb --list | grep "/cnf-fw-01/" Defaulted container "f5-observer-receiver" out of: f5-observer-receiver, fluentbit 2026/07/15 18:12:09 INFO dialing to observer addr=0.0.0.0:8088 f5-log-ID=0612007a cnf-fw-01/tmm/f5-tmm-fcc888779-w98zh:f5-tmm:ae28ae8bf4ecb2de9f9a1d0674fb47f8acb2eab1bb46727e285e2cbcae87266b/cnf-fw-01/fw_context_stat 2026-07-15 18:11:22 763 cnf-fw-01/tmm/f5-tmm-fcc888779-w98zh:f5-tmm:ae28ae8bf4ecb2de9f9a1d0674fb47f8acb2eab1bb46727e285e2cbcae87266b/cnf-fw-01/virtual_server_stat 2026-07-15 18:11:22 3101 cnf-fw-01/tmm/f5-tmm-fcc888779-w98zh:f5-tmm:ae28ae8bf4ecb2de9f9a1d0674fb47f8acb2eab1bb46727e285e2cbcae87266b/cnf-fw-01/dns_cache_resolver_stat 2026-07-15 18:11:22 5162 cnf-fw-01/tmm/f5-tmm-fcc888779-w98zh:f5-tmm:ae28ae8bf4ecb2de9f9a1d0674fb47f8acb2eab1bb46727e285e2cbcae87266b/cnf-fw-01/profile_dns_stat 2026-07-15 18:11:22 7500 cnf-fw-01/tmm/f5-tmm-fcc888779-w98zh:f5-tmm:ae28ae8bf4ecb2de9f9a1d0674fb47f8acb2eab1bb46727e285e2cbcae87266b/cnf-fw-01/profile_tcp_stat 2026-07-15 18:11:22 972 cnf-fw-01/tmm/f5-tmm-fcc888779-w98zh:f5-tmm:ae28ae8bf4ecb2de9f9a1d0674fb47f8acb2eab1bb46727e285e2cbcae87266b/cnf-fw-01/pool_member_stat 2026-07-15 18:11:22 2156 cnf-fw-01/tmm/f5-tmm-fcc888779-w98zh:f5-tmm:ae28ae8bf4ecb2de9f9a1d0674fb47f8acb2eab1bb46727e285e2cbcae87266b/cnf-fw-01/fw_rule_stat 2026-07-15 18:11:22 1588 cnf-fw-01/tmm/f5-tmm-fcc888779-w98zh:f5-tmm:ae28ae8bf4ecb2de9f9a1d0674fb47f8acb2eab1bb46727e285e2cbcae87266b/cnf-fw-01/dos_stat 2026-07-15 18:11:22 3828 cnf-fw-01/tmm/f5-tmm-fcc888779-w98zh:f5-tmm:ae28ae8bf4ecb2de9f9a1d0674fb47f8acb2eab1bb46727e285e2cbcae87266b/cnf-fw-01/fw_container_stat 2026-07-15 18:11:22 1213 Now, let's have a closer look at one of the segments, below is the FW context [cloud-user@ocp-provisioner f5-cne-2.2.0]$ oc exec sts/f5-observer-receiver -n cne-core -- mdb --segment cnf-fw-01/tmm/f5-tmm-fcc888779-w98zh:f5-tmm:ae28ae8bf4ecb2de9f9a1d0674fb47f8acb2eab1bb46727e285e2cbcae87266b/cnf-fw-01/fw_context_stat Defaulted container "f5-observer-receiver" out of: f5-observer-receiver, fluentbit 2026/07/15 18:12:49 INFO dialing to observer addr=0.0.0.0:8088 f5-log-ID=0612007a -----BEGIN RESOURCE----- Meta: Name: fw_context_stat Unit: Annotations: k8s.namespace.name: cnf-fw-01 Labels: f5.firewall.context.context_name: cnf-fw-01-forwarding-any-virtual-server-SecureContext_vs f5.firewall.context.context_type: virtual f5.firewall.context.policy_type: 1 TTL: 0s Value: [2428 0 0 0] -----END RESOURCE----- Now, let's have a look at the virtual servers stats [cloud-user@ocp-provisioner f5-cne-2.2.0]$ oc exec sts/f5-observer-receiver -n cne-core -- mdb --segment cnf-fw-01/tmm/f5-tmm-fcc888779-w98zh:f5-tmm:ae28ae8bf4ecb2de9f9a1d0674fb47f8acb2eab1bb46727e285e2cbcae87266b/cnf-fw-01/virtual_server_stat Defaulted container "f5-observer-receiver" out of: f5-observer-receiver, fluentbit 2026/07/15 18:14:24 INFO dialing to observer addr=0.0.0.0:8088 f5-log-ID=0612007a -----BEGIN RESOURCE----- Meta: Name: virtual_server_stat Unit: Annotations: k8s.namespace.name: cnf-fw-01 Labels: f5.virtual_server.destination: 0.0.0.0 f5.virtual_server.name: cnf-fw-01-forwarding-any-virtual-server-SecureContext_vs f5.virtual_server.source: 0.0.0.0 TTL: 0s Value: [1844667 108023672 0 4 28282 69732 2542 0 0 0 0 108023672 1844587 0 4 69732 28280 2542] -----END RESOURCE----- -----BEGIN RESOURCE----- Meta: Name: virtual_server_stat Unit: Annotations: k8s.namespace.name: cnf-fw-01 Labels: f5.virtual_server.destination: 10.1.20.100 f5.virtual_server.name: cnf-fw-01-cnf-dohapp-virtual_server f5.virtual_server.source: 0.0.0.0 TTL: 0s Value: [0 0 0 0 0 0 0 0 0 0 0 0 0 0 0 0 0 0] -----END RESOURCE----- -----BEGIN RESOURCE----- Meta: Name: virtual_server_stat Unit: Annotations: k8s.namespace.name: cnf-fw-01 Labels: f5.virtual_server.destination: 10.1.30.100 f5.virtual_server.name: cnf-fw-01-dnsx-app-listener-virtual_server f5.virtual_server.source: 0.0.0.0 TTL: 0s Value: [0 0 0 0 0 0 0 0 0 0 0 0 0 0 0 0 0 0] -----END RESOURCE----- With Observer you have aggregated observer receiver to monitor and observe your CNF deployment. Conclusion As a conclusion, why would you go to V2 metrics vs V1, there are four pain points with V1 in distributed environments: Stream count; One virtual server across six TMM pods gives you six independent metric series in Prometheus, same stat, six rows, differentiated only by tmmID. That's not an observability system. That's a spreadsheet you have to reassemble manually every time you open Grafana. Data loss; A pod gets evicted mid-scrape and its cumulative counters are gone. The Receiver in the TODA pipeline holds that data in a local volume and merges it before export. Your charts stay clean. PromQL tax; In V1, every panel needs a sum() by (virtual_server) wrapper or the numbers are wrong. Not approximately wrong, it's wrong by a factor of N. V2 aggregates inside the pipeline, at the Observer, before the metric ever reaches Prometheus. One series. Use it directly. The naming; V1 embeds the VS name in the metric path. That's not how Prometheus is supposed to work, and everything downstream, like alerting rules, federation, label matchers fight it. V2 puts the VS identity where it belongs: as an attribute, f5.virtual_server.name. Short metric name, proper labels, and PromQL that actually reads like PromQL. The TODA pipeline ( TMM Scraper, Receiver, Observer ) exists specifically to close the visibility gap. The Receiver is the persistence layer. The Observer is the aggregation engine. Together they turn N pod streams into one coherent signal. If you take one thing from this: aggregation has to happen somewhere. In V1, it happens in your head, on every dashboard panel, every time. In V2, it happens in the pipeline, once, before the data leaves the cluster. That's the whole difference. Related Resources Distributed TODA for Stats Aggregation CNFs Event Logs Performance Visualization (Prometheus + Grafana) OTEL Statistics Reference CNF Log Formats Reference Debug Sidecar Overview Troubleshooting Common Errors 82Views2likes0Comments
ADC01 – Weak DNS Practices
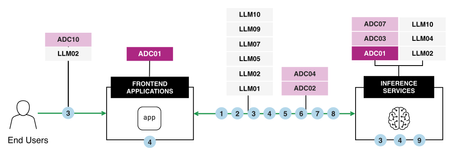
Introduction DNS is often the unsung hero of application delivery, quietly humming along until something goes wrong. This cornerstone of internet infrastructure translates human readable domain names into machine friendly IP addresses, bridging the gap between users and applications. While vital, DNS frequently gets overlooked, leading to unforeseen performance, availability, scalability, and security issues in application delivery. In today's interconnected world, where seamless application delivery is critical across industries such as finance, healthcare, insurance, telecommunications, hi-tech, energy, government, retail and e-commerce, automotive, and manufacturing, weak DNS practices can wreak havoc. Since stakes are high and user expectations demand near instantaneous responsiveness and reliability, the principles discussed here apply universally. Businesses in any sector must recognize DNS as more than just a basic utility because it is a foundational layer of their application delivery strategy. AI Reference Architecture Use Case example: Enhancing DNS Security and Performance with F5 BIG-IP To better understand how optimized DNS practices strengthen application delivery, let’s consider the following real world use case: Steps in the DNS Optimization Process: Client Initiates DNS Query: A client, located on the external network, initiates a DNS query to resolve a domain name. Query Passes Through F5 BIG-IP: The F5 BIG-IP acts as a secure DNS proxy, validating the query and applying DNSSEC (Domain Name System Security Extensions) for added cryptographic security. DNSSEC ensures that queries are not tampered with and originate from a legitimate source. Authoritative DNS Responds: The validated query is routed securely to the authoritative DNS server cluster within the internal network. The authoritative DNS responds with the appropriate IP address. Response Returned to Client: The optimized, secure response is returned to the client with minimal latency, leveraging DNSSEC and optimized TTL (Time-to-Live) settings for better user experience. This workflow illustrates how incorporating F5 BIG-IP into your DNS architecture can enhance application security, scalability, and performance. Consequences of Weak DNS Practices Impact on Performance DNS inefficiencies are a hidden bottleneck for application performance. In 2023, nearly 27% of user complaints about poor application performance stemmed from DNS related slowdowns (Auvik). When DNS servers aren’t optimized or critical security features like DNS Security Extensions (DNSSEC) are absent, the impact cascades across application performance: Latency increases: Low TTL (Time-to-Live) settings overload DNS servers with repeated queries, slowing down responses for users spread across regions. Vulnerability to hijacking: Without DNSSEC, attackers can intercept or redirect traffic to slower or malicious servers, significantly impacting response times and user experience. Impact on Availability DNS disruptions, either due to attacks or misconfigurations, can lead to major availability issues. For instance: DNS hijacking or cache poisoning: Attackers inject fake records into DNS servers, redirecting users to harmful websites. Without DNSSEC, these vulnerabilities remain exploitable, leading to user mistrust. Low or mismatched TTL settings: These settings exacerbate availability problems by overwhelming DNS servers during failovers or scaling events, making applications inaccessible during critical times. Cloud-based global applications, which rely on dynamic DNS updates to remain accessible, worsen the problem when DNS configurations cannot keep pace with the scaling requirements of infrastructure. Impact on Scalability Scalability is a fundamental goal for any global application. Yet, weak DNS practices create bottlenecks: Dynamic DNS updates: Insecure or improperly authenticated dynamic DNS updates disrupt routing, crippling the application’s ability to handle increased user demand. Unprepared DNS infrastructure: With global audiences and fluctuating traffic volumes, under-provisioned or misconfigured DNS servers can experience elevated latency and outages, hindering business growth and reducing global reach. Impact on Operational Efficiency Operational inefficiencies arise from frequent DNS queries (due to low TTLs) and insecure configurations. IT teams become mired in troubleshooting and responding to incidents like DDoS attacks, instead of focusing on broader strategic goals. Moreover, the resources directed toward mitigating DNS-related issues inflate operational costs unnecessarily, wasting valuable time and money. The Undeniable Need for Best Practices To avoid these pitfalls, organizations need to prioritize robust DNS architectures. Here are key practices to implement: DNSSEC for Security DNSSEC (Domain Name System Security Extensions) operates as a safeguard against cache poisoning and DNS hijacking attacks. Implementing DNSSEC ensures the cryptographic validation of DNS records, mitigating risks from unauthorized changes. This adds a layer of trust and reliability to your DNS infrastructure and by extension to user experiences. DNSSEC is no longer a luxury, but a necessity for securely connecting users across the globe. Optimized TTL Settings for Balance TTL settings determine how long DNS information is cached by resolvers before they query authoritative DNS servers. Too short a value results in frequent DNS lookups, increasing server load and latency. Conversely, excessively long TTL values cause outdated information during dynamic scaling. Organizations should analyze traffic patterns and application behavior to strike the right balance. Regular revisions of TTL settings ensure that user queries are routed efficiently without bottlenecking operations. Secure Dynamic DNS Update Dynamic DNS updates are essential for cloud-based infrastructures where IP addresses frequently change. However, insecure update mechanisms are a gold mine for attackers, providing opportunities to alter DNS records maliciously. By using authentication and encryption mechanisms for DNS updates, organizations can protect records and optimize routing seamlessly. Distributed DNS Architecture Relying on a single DNS service provider or a centralized DNS setup increases the risks of downtime. By spreading DNS across multiple geographically independent providers and locations, organizations ensure better fault tolerance and reliability. Global Implications of Weak DNS In 2023, 90% of organizations faced DNS attacks, with financial losses averaging $1.1 million per incident (EfficientIP). These attacks are not just a cost center but also a real time disruption that tarnishes brand reputation and user trust. Each organization encounters an average of 7.5 DNS attacks annually, underlining the broad spectrum of vulnerabilities across industries. Global operations are particularly susceptible to DNS misconfigurations and weaknesses. Whether through hijacking traffic, launching DDoS campaigns, or exploiting TTL mismanagement, attackers leverage DNS vulnerabilities to cripple applications and compromise sensitive data. To scale securely, organizations need DNS practices aligned with industry standards, steering away from outdated configurations or reliance on "default" infrastructure. Final Thoughts Weak DNS practices are a silent killer of application performance, availability, scalability, and operational efficiency. The good news? These challenges are entirely avoidable. By implementing DNSSEC, optimizing TTL settings, securing dynamic DNS updates, and adopting distributed DNS strategies, organizations can dramatically reduce these risks. In the digital landscape of today, where milliseconds can dictate millions in revenue, DNS cannot be an afterthought. It must be a core pillar of application delivery strategies, ensuring that every user query is answered rapidly, reliably, and securely. DNS influences every aspect of the user experience. It’s the first impression your application makes. Don’t squander it. As your applications scale to meet global demand, strong DNS practices will ensure they deliver consistently, no matter where users click “Buy Now.” Reference Articles Scaling, Securing, and Optimizing DNS Hyperscale and Protect Your DNS While Optimizing Global App Delivery Intelligent DNS Firewall for Service Providers F5 DNS: Global Server Load Balancing The Application Delivery Top 10 ADSP Platform overview AI reference architecture The BIG-IP GTM: Configuring DNSSEC Configuring BIG-IP for Zone Transfer and DNSSEC74Views0likes0CommentsPKI Today 2026: Step One Is Always Inventory. You Haven't Done It.
Every PQC roadmap, every regulator, every agency opens with the same unglamorous instruction: inventory your cryptography first. There's a reason it's always step one, and it isn't bureaucratic throat-clearing. The reason is that all three of the pressures (horses) from the previous article, the cert validity compression, the post-quantum migration, and the FIPS sunset, share a single precondition. We can't shorten the renewal cycle on a certificate we don't know exists, we can't swap an algorithm we can't locate, and we can't prove a boundary is validated if we've never established where the boundary is. Discovery isn't the first task because someone enjoys paperwork. It's the first task because every other task lies undefined until it's done. The deadlines already have dates. Our cryptographic inventory does not yet exist. Start with what "cryptography" means here, because the word does more work than people expect. It's not your web TLS certificates alone: It's your TLS certificates AND The keys behind the code-signing pipeline The algorithms inside your VPN and SSH The cipher suites your load balancers negotiate, The crypto library static-linked across three dependencies deep into an application nobody's patched since 2019 The keys sitting in an HSM whose firmware you never audited (let's be honest, not many people have) The partner API's and Saas integrations you call, whose TLS and cert lifecycles you don't control but whose failure still breaks your pipeline anyway The machine-readable artifact for capturing all of that is the Cryptography Bill of Materials (CBOM), which extends a software Bill of Materials (SBOM) you may already produce [1] down into cryptographic specifics: which algorithm, which key length, which library, used where. The inventory itself is a federal requirement rather than a suggestion. NSM-10 and OMB M-23-02 direct agencies to maintain a prioritized inventory of cryptographic systems and to report on it, and NIST's transition guidance treats that inventory as the prerequisite for everything downstream [2][3]. The CBOM is the format that federal discovery work, including NIST's National Cybersecurity Center of Excellence (NCCoE) migration project, increasingly converges on [4], even where the binding mandate names the inventory rather than the file. Here is the trap, and it's quiet. Cryptographic inventories that are supposed to cover everything tend to collapse into TLS certificate inventories, because certs are the easiest thing to scan and count. Resist letting the scope collapse, but do let the sequencing reflect the urgency of the other deadlines: Certificates go to the front of the inventory & remediation queue, not because they matter more than code signing or VPN keys, but because they are where the first hard, externally imposed deadline lands. The 47-day impacted regime in the next piece has a date on it. Your code-signing migration, for now, does not. So you inventory everything and you triage certificates first, and those are two different statements that are dangerously easy to blur into one. The hard part of discovery is that it is never complete, and the entries that hurt you are the ones you didn't find. You will catch the certificates you provisioned on purpose. You will miss the self-signed cert an engineer stood up for a staging box in 2021, the key baked into a firmware image, the dependency that quietly pulls in its own TLS stack. No single method finds everything: Method Sees Misses Network scanning What answers on a port Anything not listening/exposed CT log mining What was publicly logged Internal/non-public certs, anything pre-CT-era Host agents What's installed on a managed endpoint Unmanaged hosts, shadow IT Source analysis What's compiled/linked in Runtime-only config, anything not in the repo you're scanning A realistic inventory process coordinates across all of them and still assumes it is incomplete, because the alternative is learning about the gap when a certificate you never knew about expires at two in the morning. Have I received that call? Yup. One discovery detail is worth singling out now, because it returns later in this article series with real consequences. When your inventory records that an appliance is "FIPS validated," that sentence isn't yet a fact, it's three possible facts. The validated boundary might be the software cryptographic module, the appliance as a whole, or an attached hardware security module, and on a platform like F5's BIG-IP those are genuinely different scopes with different validation status [5]. A CBOM entry that says "validated" without recording which boundary it means is an entry that will mislead you exactly when you can least afford it, during a migration whose whole premise is knowing what is actually certified. Record the boundary, not just the checkmark. None of this is glamorous, most of it is tedious, which is precisely why it gets deferred until a deadline drags it into the open. A finished inventory is the first time most teams see their real cert count. The second that number is on screen, the next problem introduces itself, because every one of those certs is about to need renewing far more often than it does today. Guess what topic we're teeing up for in the next article? References [1] CycloneDX (OWASP). Cryptography Bill of Materials (CBOM), an extension of the Software Bill of Materials that captures cryptographic assets (algorithms, key lengths, libraries, certificates) and their usage context. [2] National Security Memorandum 10 (NSM-10), May 2022, and Office of Management and Budget Memorandum M-23-02, "Migrating to Post-Quantum Cryptography," November 2022 [3] NIST IR 8547, Transition to Post-Quantum Cryptography Standards. [4] NIST National Cybersecurity Center of Excellence. SP 1800-38, Migration to Post-Quantum Cryptography [5] F5 BIG-IP FIPS 140-3 validation84Views3likes0CommentsStreamlining F5 WAF for NGINX Telemetry to Splunk via F5 NGINX One Console
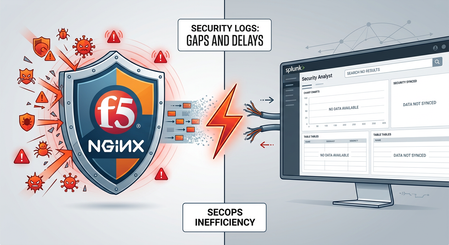
Modern application delivery platforms require centralized security management and observability. F5 NGINX One Console addresses this need by offering a unified management plane for distributed NGINX fleets, including a built-in Security Dashboard that provides platform and security teams with instant visibility into WAF activity, threat spikes, and active enforcement policies across instances. However, in enterprise environments, security operations are rarely isolated. Security Operations Center (SOC) teams rely heavily on SIEM platforms like Splunk as their central command center for threat correlation, incident response, and forensic investigations. While the built-in NGINX One Console Security Dashboard works well for platform operators, enterprise SecOps teams need WAF event data integrated seamlessly into their existing SIEM platforms. What was missing was an automated, effortless export mechanism to stream security logs from F5 WAF for NGINX into Splunk—eliminating complex manual log formatting and custom pipeline management. The Traditional Challenge: Log Format Expertise and Configuration Drift SecOps teams live in Splunk. It's where they correlate threats, investigate incidents, and build forensic timelines. But getting WAF security logs into Splunk has traditionally been a pain: **Custom log formats** -- Engineers had to hand-craft key-value or JSON schemas that Splunk could parse without choking on syntax errors. **Manual config edits on every instance** -- Someone had to SSH into each NGINX node to set up log templates and syslog destinations. **Configuration drift at scale** -- Managing logging configs individually across multi-cloud or containerized deployments meant inconsistent profiles and constant maintenance overhead. The result? WAF protection and SOC visibility lived in separate worlds. Security telemetry was harder to set up than the security policy itself. Closing the Gap: GUI-Driven Log Profile Management in NGINX One Console To eliminate this operational friction, F5 NGINX One Console introduces centralized GUI-driven Log Profile Lifecycle Management for F5 WAF for NGINX. Rather than manually authoring log format directives or updating individual instance configuration files, teams can now define, deploy, and manage Splunk-ready logging profiles across distributed NGINX environments in just a few clicks. What's under the hood: Built-in Splunk Template (log_f5_splunk): Pre-configured with an optimized key-value pair schema designed for native ingestion and automatic field extraction in Splunk. Centralized Deployment Engine: Allows administrators to define log profiles (capturing legal, illegal, or all requests) and push them out uniformly across targeted NGINX instances or instance groups. Automated Pipeline Configuration: Generates and validates the required NGINX directives automatically, ensuring seamless, error-free integration with remote syslog collectors. Video Walkthrough & Live Attack Demonstration Watch how NGINX One Console simplifies log profile deployment and enables real-time threat tracing in Splunk: Conclusion Securing modern web applications requires a tight feedback loop between threat protection and threat visibility. While F5 WAF for NGINX provides robust, low-latency defense at the application edge, the F5 NGINX One Console completes the equation by making security telemetry effortless to deploy and standardize. By delivering GUI-driven, Splunk-native log profile management, organizations can eliminate the friction between platform management and security operations—ensuring every blocked attack contributes directly to SOC intelligence and faster incident response. Resources To learn more about configuring log profiles for your NGINX fleet, refer to the official F5 NGINX One Console Log Profile Documentation.37Views1like0CommentsAutomatic Certificate Management with ACMEv2 in F5 BIG-IP
One of the most anticipated features of F5 BIG-IP is integration with ACMEv2. With the General Availability of BIG-IP 21.1.0 on May/26, this feature came into being. In this tutorial, we are going to configure it, using Let's Encrypt as the CA. The domain for which we are generating/renewing certificates is carlosf5lab.lat. The official docs for this feature are located in SSL Certificate Management | BIG-IP Documentation. Pre-requisite 1: DNS Resolver that can reach the internet (at least the CA endpoints). In this case, we are using the native DNS Resolver that comes with BIG-IP. Pre-requisite 2: The internal proxy that will make the connection with the CA. Pre-requisite 3: a self signed SSL certificate that the ACMEv2 protocol uses as the identifier for a device account. You don't have to fill the Subject Alternative Name. For the Common Name, an e-mail contact is advised. Now, we are going to create the ACME Provider object. Give it a name, and select the internal proxy previously created. For the CA Certificate to enable the secure connection with the Directory URL, you can use the default ca-bundle.crt. The Directory URL is the endpoint for the ACMEv2 protocol. In Let's Encrypt case, it is https://acme-v02.api.letsencrypt.org/directory For the Account Key, choose the previously created self-signed certificate. For the trickier part of all, the field "Contacts" is mandatory, and it must be an URL. That’s why you must use the format mailto:email_address. Check the Terms and Conditions, and the Create Account boxes. After a while, the Account Status must read as "Valid". To prove you own the domain whose certificate Let's Encrypt is going to create/renew, it must be pointing to an IP (A Record) where you must have your Virtual Server listening on Port 80 configured to respond to the ACMEv2 Challenge. (In this specific lab, the domain carlosf5lab.lat points to a Public IP mapped to an internal IP). Now you can order your first certificate via ACMEv2 on BIG-IP: After a while, the Key tab should read something like: Which means your certificate was generated: To track the ACME Provider, you can check its statistics: That's it, my friend! If it helped you, give a thumbs up to this post!1.8KViews6likes10CommentsF5 Distributed Cloud – Unit and Integration tests with Terraform
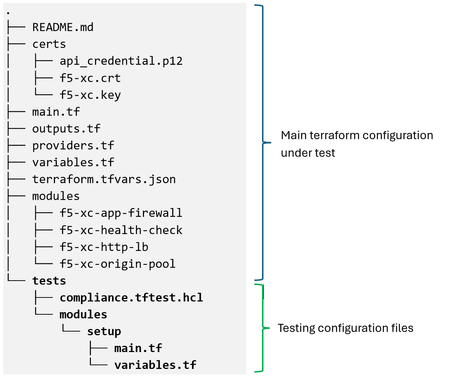
Introduction The Terraform test framework provides module authors with an integrated way to run unit and integration tests. It verifies that code changes do not introduce breaking behavior before production rollout. Terraform test prevents any risk on the existing state or infrastructure by keeping the state file in memory as an ephemeral entity. It never writes to a terraform state file, ensuring tests run completely separate from regular plan or apply workflows. The framework supports two testing models: Unit Testing: Runs a terraform plan to validate custom logic, calculations, and input conditions without provisioning real resources. This mode is fast, free, and runs entirely in memory. Integration Testing: Runs terraform apply to create temporary infrastructure, perform assertions against live resources, and automatically destroy those resources when the test completes. By default, test runs use command = apply, so integration testing creates real infrastructure and validates behavior against those deployed resources. To perform unit testing without creating infrastructure, you can override this behavior by setting the command attribute in a run block to plan. Configuration The following example shows a directory structure for terraform native tests: The main terraform configuration is based on the WAAP protected HTTP applications example: https://github.com/f5devcentral/f5-professional-services/tree/main/examples/f5-distributed-cloud/terraform/f5-xc-terraform-test. The compliance.tftest.hcl includes the logic to validate the following test cases: Check Compliance Run block Validate that a required Service Policy is inherited from the namespace if the Load Balancer is advertised on the public network and the origin server is behind a Customer Edge (CE) Security service_policy Validate that a required Service Policy is applied directly to the Load Balancer if it is advertised on the public network and the origin server is behind a CE Security service_policy Check that an App Firewall policy is applied to the HTTP Load Balancer if it is advertised on the public network Security app_firewall Verify that the Load Balancer name complies with the RFC 1035 Domain Names. Naming Governance http_load_balancer_name Verify that the HTTP Load Balancer quota is not exceeded. Resource governance quota_usage A helper module is included for managing test-specific resources such as data sources. It uses F5 Distributed Cloud Services API to get current quota usage for HTTP Load Balancers and the active namespace Service Policies: # setup module # Fetch data from a REST API data "http" "xc_quota_usage" { url = "${var.api_url}/web/namespaces/system/quota/usage" request_headers = { Accept = "application/json" } client_cert_pem = file(var.f5-xc_cert) client_key_pem = file(var.f5-xc_key) } data "http" "xc_active_sp" { url = "${var.api_url}/config/namespaces/${var.namespace}/active_service_policies" request_headers = { Accept = "application/json" } client_cert_pem = file(var.f5-xc_cert) client_key_pem = file(var.f5-xc_key) } # Use the response locals { xc_quota_usage = jsondecode(data.http.xc_quota_usage.response_body) xc_active_sp = jsondecode(data.http.xc_active_sp.response_body) } Below is the outputs.tf file for the module: output "xc_quota_usage" { value = { "HTTP" = local.xc_quota_usage.objects.http_loadbalancer.usage.current } } output "xc_active_sp" { value = local.xc_active_sp.service_policies[*].name } The variables.tf file used by the module is shown below: # setup module variables variable "tenant" { default = "<tenant_id>" } variable "api_url" { default = "https:// <tenant_name>.console.ves.volterra.io/api" } variable "f5-xc_cert" { default = "./certs/xc.crt" } variable "f5-xc_key" { default = "./certs/xc.key" } variable "namespace" { default = "default" } The main test file included in the test directory, compliance.tftest.hcl, contains the test logic within run blocks that applies a terraform “plan” or “apply” command to perform assertions on the resulting state: # compliance.tftest.hcl run "global_setup" { # This block initializes a module to fetch information required # for testing. module { source = "./tests/modules/setup" } } run "service_policy" { command = plan variables { required_service_policies = "allow-vpn-ip-demo-sp" } # Check that a required Service Policy is inherited from the # namespace if the Load Balancer is advertised on the public # network and the origin server is behind a CE assert { condition = ( module.http-lb.app_lb_default_vip == false ? true : module.origin.private_origin == false ? true : (module.http-lb.app_lb_ns_service_policies == false ? true : contains(flatten(run.global_setup.xc_active_sp), var.required_service_policies)) ) error_message = "Service Policy \"${var.required_service_policies}\" must be associated with Load Balancer ${module.http-lb.app_lb_name} or inherited from the namespace." } # Check that a required Service Policy is applied directly to the # Load Balancer if it is advertised on the public network and the # origin server is behind a CE assert { condition = ( module.http-lb.app_lb_default_vip == false ? true : module.origin.private_origin == false ? true : (module.http-lb.app_lb_ns_service_policies == true ? true : contains(flatten(module.http-lb.app_lb_active_service_policies), var.required_service_policies)) ) error_message = "Service Policy \"${var.required_service_policies}\" must be explicitly associated with Load Balancer ${module.http-lb.app_lb_name} or inherited from the namespace." } } run "app_firewall" { command = plan # Check that an App Firewall policy is applied to the HTTP Load # Balancer if it is advertised on the public network assert { condition = module.http-lb.app_lb_default_vip == false ? true : length(module.http-lb.app_lb_app_firewall) > 0 error_message = "An App Firewall must be associated with Load Balancer ${module.http-lb.app_lb_name} if advertised on Internet " } } run "http_load_balancer_name" { command = plan # Check that the Load Balancer name is correct assert { condition = can(regex("^[a-z]([-a-z0-9]*[a-z0-9])?$", local.http-lb-name)) && length(local.http-lb-name) <= 63 error_message = "The resource name must be a valid DNS-1035 label: 1-63 lower-case alphanumeric characters or '-', starting with a letter and ending with an alphanumeric character." } } run "quota_usage" { command = plan # Check that the HTTP Load Balancer quota is not exceeded assert { condition = run.global_setup.xc_quota_usage["HTTP"] <= 200 error_message = "HTTP Load Balancer quota exceeded" } } The assert blocks within each run block define conditions that must evaluate to true for the test to pass. Running the tests 1. Initialize Terraform configuration. To run the tests, the Terraform workspace needs to be initialized to configure the backend and install all providers and modules referred to in the configuration (main and test): 2. Running the initial test When the terraform test command is executed, it scans the current root directory ./ and the subdirectory ./tests/ for files with .tftest.hcl or tftest.json extensions. To overwrite the default discovery behavior, the following command line flags can be used: Behavior Flag Example Change the testing directory test -test-directory terraform test -test-directory=integration-tests Run a specific test file filter terraform test -filter=tests/validation.tftest.hcl This is the main tfvars file, used to validate the run blocks { "tenant": "<tenant_id>", "api_url": "https://<tenant_name>.console.ves.volterra.io/api", "api_p12_file": "./certs/api_credential.p12", "f5-xc_cert": "./certs/xc.crt", "f5-xc_key": "./certs/xc.key", "base": "demo-app", "namespace": "demo", "domains": ["demo-app.demo.net"], "origin_servers": [ { "origin": "1.2.3.4", "site": "", "virtual_site": "onprem-demo-vs", "network": "inside" }, { "origin": "5.6.7.8", "site": "", "virtual_site": "onprem-demo-vs", "network": "outside" } ], "environment": "prod", "waf_policy": true, "service_policy": [ { "name": "allow-vpn-ip-demo-sp", "namespace": "shared" }, { "name": "allowed-sources-demo-sp", "namespace": "demo" } ], "origin_pool_port": 80, "use_tls": false } When all the assertions in the execution block pass, the test is considered successful 3. Validation of assertions 3.1. Unit testing To perform unit testing, the tests can be executed using the command = plan attribute. Setting the command to plan forces Terraform to only generate an execution plan and validate your configuration logic without creating real cloud resources, making the process fast and safe. Example 1: The required Service Policy is not active in the namespace, the Load Balancer is configured with the default setting to apply namespace policies, it is advertised on the public network, and the origin server is behind a CE. Service Policy "allow-vpn-ip-demo-sp" service policy is not in the namespace Active Service Policies: Example 2: The required Service Policy is not associated with the Load Balancer when a specific list of Service Policies is applied, it is advertised on the public network, and the origin server is behind a CE. Service Policy "allow-vpn-ip-demo-sp" service policy is removed from the tfvars file: Example 3: Verify that an App Firewall policy is applied to the HTTP Load Balancer if it is advertised on the public network. To force this test to fail, the waf_policy variable is set to false in the tfvars file: Example 4: Verify that the HTTP load balancer name conforms with the core RFC DNS 1035 rules. To force this test to fail, a period is added to the base variables in terraform.tfvars.json: Example 5: Verify that the HTTP load balancer quota has not been exceeded. To force this test to fail, a value lower than the current quota is added to the condition: 3.2. Integration testing To perform integration tests, we can run them using the command = apply attribute. By setting the command as apply, Terraform provisions real infrastructure, runs the assertions against the live resources and then automatically destroys them. Example: The required Service Policy is not active in the namespace, the Load Balancer is configured with the default setting to apply namespace policies, it is advertised on the public network, and the origin server is behind a CE. Service Policy "allow-vpn-ip-demo-sp" service policy is not in the namespace Active Service Policies: The ephemeral resources are created: The audit log entries record the creation and deletion of resources: Conclusion The native terraform test framework offers a secure and unified way to validate F5 Distributed Cloud Services Infrastructure by operating against test-specific, short-lived resources. This lets you detect breaking changes early and use the assertions as built-in guardrails, ensuring infrastructure code quality without complex external dependencies.176Views0likes0Comments