availability
957 TopicsHTTP Load Balancer Routes on F5 Distributed Cloud
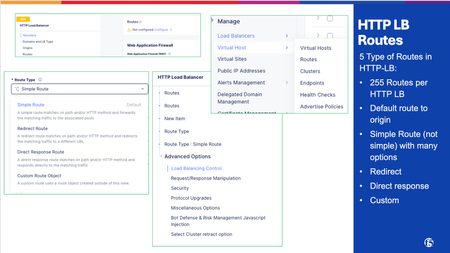
Route misconfiguration is one of the most common configuration mistakes we see that can cause incidents on F5 Distributed Cloud (F5 XC). The four route types look deceptively simple in the console, but they have distinct behaviors, ordering rules, and gotchas. This article covers all four types with real field names, decision guidance, and the mistakes that actually happen in production. What Routes Do in F5 XC HTTP Load Balancer An HTTP Load Balancer in F5 XC is a full L7 proxy running at the Regional Edge (RE) and depending on the deployment model, Customer Edge (CE). We will use the Regional Edge as a deployment model for this article. When a request arrives, the RE evaluates the route list in order and applies the first matching route. That route determines what happens to the request: forward it to an origin, redirect the client, return a synthetic response, or apply advanced routing logic. Routes can be configured inside the HTTP Load Balancer configuration which opens a new Route Options window: Multi-Cloud App Connect > Load Balancers > HTTP Load Balancers > [your LB] > Routes > Route Options The four route types map to three underlying route actions: XC Route Type Route Action Traffic Goes To Simple Route route Origin Pool Redirect Route redirect Client (3xx response) Direct Response Route direct_response Client (fixed response body) Custom Route route / redirect / direct_response Depends on configuration Route Matching: How XC Evaluates Routes Route evaluation is sequential, stops on first match, and has no automatic specificity ranking. The order you set is the order XC uses. Evaluation Order The HTTP Load Balancer evaluates routes sequentially, top to bottom. The first route that matches the incoming request wins. No further routes are evaluated. This means: More specific routes must appear before broader ones. A catch-all route (prefix /) at the top will swallow everything. Nothing below it will ever match. Path Match Types Three path match types are available across all route types: Match Type Field Behavior Prefix path_prefix Path must begin with the specified string Exact exact Path must equal the value exactly (query string excluded) Regex regex Entire path (minus query string) must match the regex pattern Prefix matching pitfall: The prefix /api matches /api/v1/users but also /apikeys and /api-internal. If you want to match a path segment boundary, use /api/ (trailing slash) or switch to regex. Additional Matching Criteria Beyond path, routes can match on: HTTP methods: GET, POST, PUT, DELETE, etc. Request headers: presence, exact value, regex Query parameters: Retain, Remove, or Replace Combining criteria (e.g., path prefix + method + header) creates an AND condition: all specified criteria must match. Route Type 1: Simple Routes Simple routes are the workhorse of most HTTP Load Balancer configurations. They match a path (and optionally method/headers) and forward traffic to an Origin Pool. When to Use Standard application traffic forwarding Path-based routing to different backend services API versioning (/v1/ → pool A, /v2/ → pool B) Microservice fanout from a single domain Key Configuration Fields Field Description Path match type Prefix / Exact / Regex HTTP Method Any, GET, POST, PUT, etc... Origin Pool The backend pool receiving the request Host Rewrite Method Disable/ Hostname / Header value: rewrites the Host header sent to origin Query Parameters Retain, Remove, Replace Advanced Options Worth Knowing Path rewriting (under Advanced Options): Disabled: path sent to origin unchanged Prefix Replacement: replaces the matched prefix with a new string (e.g., strip /api/v1 prefix before sending to origin) Regex-based: full regex substitution on the path Retry policy: The default retry policy is 1 retry on 5xx responses. Set this explicitly for your application in every route: Disabled: no retries; required for write operations Default: 1 retry on 5xx Custom: specify retry conditions, count, and interval Per-route WAF override: Each simple route can attach its own WAF App Firewall policy. This completely replaces the load balancer-level WAF for matching requests; it is not additive. Use this to enforce stricter rules on sensitive paths (e.g., /admin/) or to relax inspection on certain paths. Example: API Path Routing Route 1: Prefix /api/v2/ → origin-pool-v2 (exact origin for v2) Route 2: Prefix /api/v1/ → origin-pool-v1 (legacy backend) Route 3: Prefix /api/ → origin-pool-api (catch-all for API paths) Route 4: Prefix / → origin-pool-web (catch-all for everything else) Order matters here. If route 3 or 4 appeared first, routes 1 and 2 would never fire. Route Type 2: Redirect Routes Redirect routes return an HTTP 3xx response directly to the client. No origin pool is involved: the RE handles the response entirely. When to Use HTTP → HTTPS redirect (though XC has a dedicated LB-level toggle for this) Domain canonicalization (www.example.com → example.com) Legacy URL migrations (/old-path/ → /new-path/) Temporary redirects during maintenance or A/B migrations Key Configuration Fields Field Description Protocol HTTP or HTTPS Host Target FQDN; supports non-standard ports Redirect Path / URI Target path; if left unset, original URI is preserved (including query string) Response Code 301 (Permanent), 302 (Temporary), 307, 308 Redirect Behavior: URI Preservation When you leave the redirect path unset, XC preserves the original URI path and query string in the Location header. This is useful for protocol/host-only redirects where you just want to change the scheme or domain without touching the path. Example: Redirect all HTTP traffic to HTTPS on the same host: Protocol: HTTPS Host: same-as-request (leave blank or match domain) Path: (unset — preserve original URI) Code: 301 Redirect Route Limitations Simple redirect routes (defined directly on the LB) do not support custom header manipulation on the redirect response. If you need to inject headers (e.g., Cache-Control: no-store on the redirect response), use a Custom Route object instead. Route Type 3: Direct Response Routes Direct response routes return a fully synthetic HTTP response to the client. The request never reaches an origin pool: the RE generates the response itself. When to Use Health check endpoints that should always return 200 (e.g., /healthz) without touching the app Maintenance mode pages: serve a 503 with a message body while origin is down Blocking specific paths with a meaningful error body (vs. a generic deny) Canary or feature-flag placeholders that return 404 before the feature ships Robots.txt or security.txt served from the edge without an origin Key Configuration Fields Field Description HTTP Status Code Any valid HTTP status code (200, 403, 503, etc.) Response Body Static text or HTML body returned to client Path match Same prefix/exact/regex options as other route types Example: Edge-Served Health Check Path: Exact /healthz Method: GET Action: Direct Response Status: 200 Body: OK This responds to health probes from AWS ALB, Kubernetes ingress controllers, or uptime monitors without any load on the backend. Particularly useful during blue/green deployments when the app might not yet be healthy. Route Type 4: Custom Routes Custom routes reference standalone Route objects created separately in XC and attached to one or more HTTP Load Balancers. Unlike the other three types, they follow a service-mesh model rather than a traditional LB model. When to Use Custom Routes Weighted traffic splitting between origin pools (canary releases, blue/green) Request/response header manipulation not available on simple routes Advanced retry policies with specific conditions and intervals Traffic mirroring (shadow traffic to a secondary backend for testing) Reusable route logic shared across multiple load balancers Architecture: Route Objects vs. Inline Routes Inline routes (simple, redirect, direct response) are defined directly on the HTTP Load Balancer. Custom route objects are: Created as standalone objects under Multi-Cloud App Connect Referenced by the HTTP Load Balancer Reusable: multiple LBs can reference the same route object Weighted Clusters Custom routes enable weighted traffic splitting across multiple upstream clusters, equivalent to BIG-IP pool ratio weights or AWS ALB weighted target groups. Route: Prefix /api/ Cluster A (origin-pool-v2): weight 90 Cluster B (origin-pool-v1): weight 10 This is the correct mechanism for canary deployments and gradual traffic shifts on F5 XC. The weights are percentage-based and must sum to 100. Header Manipulation Custom routes support header operations at the route level, applied before forwarding to origin: Operation Direction Example Add header Request X-Forwarded-For: {client-ip} Remove header Request Strip Authorization before certain paths Add header Response Strict-Transport-Security: max-age=31536000 Remove header Response Strip Server header from responses Header manipulation runs in order: route-level → virtual host-level → route configuration-level. Retry Policies Route retry policies take complete precedence over any virtual host-level retry policy. Configure explicitly: Field Description Retry on Conditions: 5xx, gateway-error, reset, connect-failure, retriable-4xx Number of retries Integer Per-try timeout Timeout applied to each individual retry attempt Retry interval Base interval between retries Traffic Mirroring Mirror policies shadow a copy of each request to a secondary cluster. The mirrored request is fire-and-forget. Example: Testing a new backend version against live traffic without affecting users Security analysis pipelines Route Ordering and Priority Route order is the most common source of routing bugs in XC deployments. There is no automatic specificity ranking; you own the order. The Rules Routes evaluate top to bottom. First match wins. Evaluation stops. Disabling a route (via the Route Activation Status toggle) does not remove it: traffic falls through to the next matching route. Recommended Ordering Pattern Order routes from most specific to least specific: Exact paths first Exact /api/v2/auth/token 2. Specific prefixes next Prefix /api/v2/ 3. Broader prefixes after Prefix /api/ 4. Path-specific exceptions Exact /healthz 5. Catch-all last Prefix / Common Ordering Mistakes Mistake Symptom Fix Catch-all prefix / first All traffic hits one origin; other routes never fire Move catch-all to last position /api prefix before /api/v2/ V2 traffic hits wrong origin Reverse the order Disabled/Unused route above active route Traffic silently hits next route with different behavior Remove disabled routes; don't rely on toggle for permanent changes Redirect route below a prefix match Redirect never fires Move redirect above the prefix that would match it first Common Mistakes and Gotchas Prefix /api matches /apikeys. The prefix match does not anchor to path segment boundaries. /api matches /api/, /api/v1/, and also /apikeys, /api-docs. Use /api/ (trailing slash) or regex if segment boundary matters. Per-route WAF is a full replacement, not additive. Attaching a WAF policy to a route does not stack with the LB-level WAF. It replaces it entirely for that route. If your LB WAF is in blocking mode and you attach a route-level WAF in monitoring mode, that route is now in monitoring mode only. Custom routes enforce TLS: test before production. If your origin uses a self-signed certificate and you switch from a simple route to a custom route without uploading the Root CA, connections will fail. Test in a staging environment first. Header manipulation on redirect requires a custom route object. Simple redirect routes in XC do not support response header injection. If you need Cache-Control or Vary headers on your redirects, you must use a standalone custom route object with redirect action. Regex route performance at scale. Regex routes require full path evaluation on every request. At high request volumes, a large number of regex routes adds measurable CPU overhead compared to prefix or exact routes. Use regex only where prefix or exact matching is insufficient. FAQ Q: What is the difference between a Simple Route and a Custom Route? A: Simple routes are inline on the HTTP Load Balancer and forward traffic directly to an Origin Pool. Custom routes are standalone objects that use an Endpoints → Clusters → Routes model, support weighted traffic splits, header manipulation, and mirroring, but cannot reference Origin Pools directly. Q: Why is my catch-all route matching everything instead of the specific routes below it? A: Route evaluation stops at the first match. If your catch-all prefix (/) is above more specific routes, it wins every time. Move the catch-all to the last position in the list. Q: Can I use a Custom Route to send traffic directly to an F5 XC Origin Pool? A: No. Custom routes do not support Origin Pools directly. They use an Endpoints → Clusters → Routes abstraction. If you need weighted splitting with Origin Pool support, custom routes are not the right fit; simple routes forward to Origin Pools but do not support weighted clusters. Q: My POST requests are creating duplicate records and I traced it to XC retries. What is happening? A: The default retry policy on simple routes is "1 retry on 5xx." A POST that hits a 500 gets retried once, potentially double-writing. Set the retry policy to Disabled on any route handling non-idempotent operations (POST, PUT, PATCH, DELETE). Q: Does attaching a WAF policy to a route add rules on top of my LB-level WAF? A: No. Per-route WAF replaces the LB-level WAF entirely for requests matching that route. If your LB WAF is in blocking mode and the route WAF is in monitoring mode, those requests are evaluated in monitoring mode only. Q: My Custom Route TLS connections to origin are failing but the same origin works fine on a Simple Route. Why? A: Custom routes enforce strict TLS with no skip-verify option. Simple routes do not have this requirement. For custom routes, upload the Root CA certificate for your origin, or use the use_volterra_trusted_ca_url flag via the API for public CAs. Self-signed certs without the Root CA uploaded will fail silently. Q: I disabled a route in the console but traffic behavior changed unexpectedly. What happened? A: Disabling a route via the Route Activation toggle does not remove it from evaluation. Traffic falls through to the next matching route in the list. If that route is a broad catch-all, the behavior shift may look correct until something that depends on specific routing breaks. Remove routes you no longer need rather than toggling them off.474Views3likes4Comments
Building digital resilience to enable digital sovereignty
In 2025, cloud service outages significantly impacted enterprises worldwide, prompting urgent calls for improved digital resilience and sovereignty strategies. Organizations face regulatory pressures and costly disruptions, necessitating robust approaches to maintain continuity and trust in critical infrastructure sectors. Digital resilience defined: Digital resilience is the capability of an organization to prevent, detect, respond to, and recover from infrastructure failures or cyberattacks, including those originating externally, making it essential for modern business continuity. Frameworks guiding resilience: Key regulatory and industry frameworks such as NIST Cybersecurity Framework, ISO/IEC 27001, COBIT, ITIL, BCM, DORA, and APRA CPS 230 provide structured guidance on managing cybersecurity, operational resilience, and third-party risk, forming the governance foundation for resilience strategies. Strategies for resilience: Effective digital resilience involves mapping applications to appropriate deployment models like distributed and redundant deployments, implementing intelligent traffic management, adaptive security, network segmentation, automation with failover testing, and continuous monitoring through visibility and analytics. Resilience and digital sovereignty: Digital resilience intersects with emerging digital sovereignty requirements that emphasize data location and governance. Achieving combined goals involves antifragile architectures that limit disruption impact, adapt to threats, and improve through learning, supported by F5 ADSP.382Views1like1CommentSimplifying Application Health Monitoring with F5 BIG-IP
A simple agreement between BIG-IP administrators and application owners can foster smooth collaboration between teams. Application owners define their own simple or complex health monitors and agree to expose a conventional /health endpoint. When a /health endpoint responds with an HTTP 200 request, BIG-IP assumes the application is healthy based on the application owners' own criteria. The Challenge of Health Monitoring in Modern Environments F5 BIG-IP administrators in Network Operations (NetOps) teams often work with application teams because the BIG-IP acts as a full proxy, providing services like: TLS termination Load balancing Health monitoring Health checks are crucial for effective load balancing. The BIG-IP uses them to determine where to send traffic among back-end application servers. However, health monitoring frequently causes friction between teams. Problems with the Traditional Approach Traditionally, BIG-IP administrators create and maintain health monitors ranging from simple ICMP pings to complex monitors that: Simulate user transactions Verify HTTP response codes Validate payload contents Track application dependencies This leads to several issues: Knowledge Gap: NetOps may not fully grasp each application's intricacies. Change Management Overhead: Application updates require retesting monitors, causing delays. Production Risk: Monitors can break after application changes, incorrectly marking services as up/down. Team Friction: Troubleshooting failed health checks involves tedious back-and-forth between teams. A Cloud-Native Solution The cloud-native and microservices communities have patterns that elegantly solve these problems. One widely used pattern is the [health endpoint], which adapts well to BIG-IP environments. The /health Endpoint Convention Cloud-native applications commonly expose dedicated health endpoints like /health, /healthy, or /ready. These return standard status codes reflecting the application's state. The /health endpoint provides a clear contract between NetOps and application teams for BIG-IP integration. Implementing the Contract This approach establishes a simple agreement: Application Team Responsibilities: Implement /health to return HTTP 200 when the application is ready for traffic Define "healthy" based on application needs (database connectivity, dependencies, etc.) Maintain the health check logic as the application changes BIG-IP Team Responsibilities: Configure an HTTP monitor targeting the /health endpoint Treat 200 as "healthy", anything else as "unhealthy" Benefits of This Approach Aligned Expertise: Application teams define health based on their knowledge. Less Friction: BIG-IP configuration stays stable as applications evolve. Better Reliability: Health checks reflect true application health, including dependencies. Easier Troubleshooting: The /health endpoint can return detailed diagnostic info, but this is ignored by the BIG-IP and used strictly for troubleshooting. Implementation Examples F5 BIG-IP Health Monitor Configuration ltm monitor http /Common/app-health-monitor { defaults-from /Common/http destination *:* interval 5 recv 200 recv-disable none send "GET /health HTTP/1.1\r\nHost: example.com\r\nConnection: close\r\n\r\n" time-until-up 0 timeout 16 } Node.js Health Endpoint Implementation const express = require('express'); const app = express(); const port = 3000; app.get('/', (req, res) => { res.send('Application is running'); }); app.get('/health', async (req, res) => { try { const dbStatus = await checkDatabaseConnection(); const serviceStatus = await checkDependentServices(); if (dbStatus && serviceStatus) { return res.status(200).json({ status: 'healthy', database: 'connected', services: 'available', timestamp: new Date().toISOString() }); } res.status(503).json({ status: 'unhealthy', database: dbStatus ? 'connected' : 'disconnected', services: serviceStatus ? 'available' : 'unavailable', timestamp: new Date().toISOString() }); } catch (error) { res.status(500).json({ status: 'error', message: error.message, timestamp: new Date().toISOString() }); } }); async function checkDatabaseConnection() { // Check real database connection return true; } async function checkDependentServices() { // Check required service connections return true; } app.listen(port, () => { console.log(`Application listening at http://localhost:${port}`); }); Adopting this health check pattern can greatly reduce friction between NetOps and application teams while improving reliability. The simple contract of HTTP 200 for healthy provides the needed integration while letting each team focus on their expertise. For apps that can't implement a custom /health endpoint, BIG-IP admins can still use traditional ICMP or TCP port monitoring. However, these basic checks can't accurately reflect an app's true health and complex dependencies. This approach fosters collaboration and leverages the specialized knowledge of both network and application teams. The result is more reliable services and smoother operations.806Views1like0Comments
Multiple Certs, One VIP: TLS Server Name Indication via iRules
An age old question that we’ve seen time and time again in the iRules forums here on DevCentral is “How can I use iRules to manage multiple SSL certs on one VIP"?”. The answer has always historically been “I’m sorry, you can’t.”. The reasoning is sound. One VIP, one cert, that’s how it’s always been. You can’t do anything with the connection until the handshake is established and decryption is done on the LTM. We’d like to help, but we just really can’t. That is…until now. The TLS protocol has somewhat recently provided the ability to pass a “desired servername” as a value in the originating SSL handshake. Finally we have what we’ve been looking for, a way to add contextual server info during the handshake, thereby allowing us to say “cert x is for domain x” and “cert y is for domain y”. Known to us mortals as "Server Name Indication" or SNI (hence the title), this functionality is paramount for a device like the LTM that can regularly benefit from hosting multiple certs on a single IP. We should be able to pull out this information and choose an appropriate SSL profile now, with a cert that corresponds to the servername value that was sent. Now all we need is some logic to make this happen. Lucky for us, one of the many bright minds in the DevCentral community has whipped up an iRule to show how you can finally tackle this challenge head on. Because Joel Moses, the shrewd mind and DevCentral MVP behind this example has already done a solid write up I’ll quote liberally from his fine work and add some additional context where fitting. Now on to the geekery: First things first, you’ll need to create a mapping of which servernames correlate to which certs (client SSL profiles in LTM’s case). This could be done in any manner, really, but the most efficient both from a resource and management perspective is to use a class. Classes, also known as DataGroups, are name->value pairs that will allow you to easily retrieve the data later in the iRule. Quoting Joel: Create a string-type datagroup to be called "tls_servername". Each hostname that needs to be supported on the VIP must be input along with its matching clientssl profile. For example, for the site "testsite.site.com" with a ClientSSL profile named "clientssl_testsite", you should add the following values to the datagroup. String: testsite.site.com Value: clientssl_testsite Once you’ve finished inputting the different server->profile pairs, you’re ready to move on to pools. It’s very likely that since you’re now managing multiple domains on this VIP you'll also want to be able to handle multiple pools to match those domains. To do that you'll need a second mapping that ties each servername to the desired pool. This could again be done in any format you like, but since it's the most efficient option and we're already using it, classes make the most sense here. Quoting from Joel: If you wish to switch pool context at the time the servername is detected in TLS, then you need to create a string-type datagroup called "tls_servername_pool". You will input each hostname to be supported by the VIP and the pool to direct the traffic towards. For the site "testsite.site.com" to be directed to the pool "testsite_pool_80", add the following to the datagroup: String: testsite.site.com Value: testsite_pool_80 If you don't, that's fine, but realize all traffic from each of these hosts will be routed to the default pool, which is very likely not what you want. Now then, we have two classes set up to manage the mappings of servername->SSLprofile and servername->pool, all we need is some app logic in line to do the management and provide each inbound request with the appropriate profile & cert. This is done, of course, via iRules. Joel has written up one heck of an iRule which is available in the codeshare (here) in it's entirety along with his solid write-up, but I'll also include it here in-line, as is my habit. Effectively what's happening is the iRule is parsing through the data sent throughout the SSL handshake process and searching for the specific TLS servername extension, which are the bits that will allow us to do the profile switching magic. He's written it up to fall back to the default client SSL profile and pool, so it's very important that both of these things exist on your VIP, or you may likely find yourself with unhappy users. One last caveat before the code: Not all browsers support Server Name Indication, so be careful not to implement this unless you are very confident that most, if not all, users connecting to this VIP will support SNI. For more info on testing for SNI compatibility and a list of browsers that do and don't support it, click through to Joel's awesome CodeShare entry, I've already plagiarized enough. So finally, the code. Again, my hat is off to Joel Moses for this outstanding example of the power of iRules. Keep at it Joel, and thanks for sharing! when CLIENT_ACCEPTED { if { [PROFILE::exists clientssl] } { # We have a clientssl profile attached to this VIP but we need # to find an SNI record in the client handshake. To do so, we'll # disable SSL processing and collect the initial TCP payload. set default_tls_pool [LB::server pool] set detect_handshake 1 SSL::disable TCP::collect } else { # No clientssl profile means we're not going to work. log local0. "This iRule is applied to a VS that has no clientssl profile." set detect_handshake 0 } } when CLIENT_DATA { if { ($detect_handshake) } { # If we're in a handshake detection, look for an SSL/TLS header. binary scan [TCP::payload] cSS tls_xacttype tls_version tls_recordlen # TLS is the only thing we want to process because it's the only # version that allows the servername extension to be present. When we # find a supported TLS version, we'll check to make sure we're getting # only a Client Hello transaction -- those are the only ones we can pull # the servername from prior to connection establishment. switch $tls_version { "769" - "770" - "771" { if { ($tls_xacttype == 22) } { binary scan [TCP::payload] @5c tls_action if { not (($tls_action == 1) && ([TCP::payload length] > $tls_recordlen)) } { set detect_handshake 0 } } } default { set detect_handshake 0 } } if { ($detect_handshake) } { # If we made it this far, we're still processing a TLS client hello. # # Skip the TLS header (43 bytes in) and process the record body. For TLS/1.0 we # expect this to contain only the session ID, cipher list, and compression # list. All but the cipher list will be null since we're handling a new transaction # (client hello) here. We have to determine how far out to parse the initial record # so we can find the TLS extensions if they exist. set record_offset 43 binary scan [TCP::payload] @${record_offset}c tls_sessidlen set record_offset [expr {$record_offset + 1 + $tls_sessidlen}] binary scan [TCP::payload] @${record_offset}S tls_ciphlen set record_offset [expr {$record_offset + 2 + $tls_ciphlen}] binary scan [TCP::payload] @${record_offset}c tls_complen set record_offset [expr {$record_offset + 1 + $tls_complen}] # If we're in TLS and we've not parsed all the payload in the record # at this point, then we have TLS extensions to process. We will detect # the TLS extension package and parse each record individually. if { ([TCP::payload length] >= $record_offset) } { binary scan [TCP::payload] @${record_offset}S tls_extenlen set record_offset [expr {$record_offset + 2}] binary scan [TCP::payload] @${record_offset}a* tls_extensions # Loop through the TLS extension data looking for a type 00 extension # record. This is the IANA code for server_name in the TLS transaction. for { set x 0 } { $x < $tls_extenlen } { incr x 4 } { set start [expr {$x}] binary scan $tls_extensions @${start}SS etype elen if { ($etype == "00") } { # A servername record is present. Pull this value out of the packet data # and save it for later use. We start 9 bytes into the record to bypass # type, length, and SNI encoding header (which is itself 5 bytes long), and # capture the servername text (minus the header). set grabstart [expr {$start + 9}] set grabend [expr {$elen - 5}] binary scan $tls_extensions @${grabstart}A${grabend} tls_servername set start [expr {$start + $elen}] } else { # Bypass all other TLS extensions. set start [expr {$start + $elen}] } set x $start } # Check to see whether we got a servername indication from TLS. If so, # make the appropriate changes. if { ([info exists tls_servername] ) } { # Look for a matching servername in the Data Group and pool. set ssl_profile [class match -value [string tolower $tls_servername] equals tls_servername] set tls_pool [class match -value [string tolower $tls_servername] equals tls_servername_pool] if { $ssl_profile == "" } { # No match, so we allow this to fall through to the "default" # clientssl profile. SSL::enable } else { # A match was found in the Data Group, so we will change the SSL # profile to the one we found. Hide this activity from the iRules # parser. set ssl_profile_enable "SSL::profile $ssl_profile" catch { eval $ssl_profile_enable } if { not ($tls_pool == "") } { pool $tls_pool } else { pool $default_tls_pool } SSL::enable } } else { # No match because no SNI field was present. Fall through to the # "default" SSL profile. SSL::enable } } else { # We're not in a handshake. Keep on using the currently set SSL profile # for this transaction. SSL::enable } # Hold down any further processing and release the TCP session further # down the event loop. set detect_handshake 0 TCP::release } else { # We've not been able to match an SNI field to an SSL profile. We will # fall back to the "default" SSL profile selected (this might lead to # certificate validation errors on non SNI-capable browsers. set detect_handshake 0 SSL::enable TCP::release } } }5KViews0likes18CommentsBIG-IP LTM VE: Transfer your iRules in style with the iRule Editor
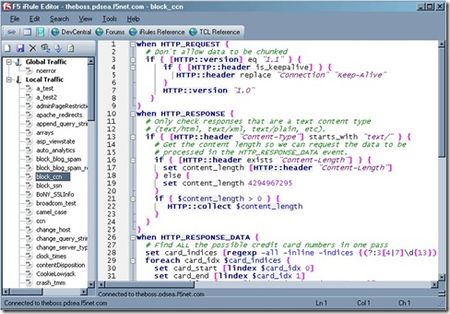
The new LTM VE has opened up the possibilities for writing, testing and deploying iRules in a big way. It’s easier than ever to get a test environment set up in which you can break things develop to your heart’s content. This is fantastic news for us iRulers that want to be doing the newest, coolest stuff without having to worry about breaking a production system. That’s all well and good, but what the heck do you do to get all of your current stuff onto your test system? There are several options, ranging from copy and paste (shudder) to actual config copies and the like, which all work fine. Assuming all you’re looking for though is to transfer over your iRules, like me, the easiest way I’ve found is to use the iRule editor’s export and import features. It makes it literally a few clicks and super easy to get back up and running in the new environment. First, log into your existing LTM system with your iRule editor (you are using the editor, right? Of course you are…just making sure). You’ll see a screen something like this (right) with a list of a bagillionty iRules on the left and their cool, color coded awesomeness on the right. You can go through and select iRules and start moving them manually, but there’s really no need. All you need to do is go up to the File –> Archive –> Export option and let it do its magic. All it’s doing is saving text files to your local system to archive off all of your iRuley goodness. Once that’s done, you can then spin up your new LTM VE and get logged in via the iRule editor over there. Connect via the iRule editor, and go to File –> Archive –> Import, shown below. Once you choose the import option you’ll start seeing your iRules popping up in the left-hand column, just like you’re used to. This will take a minute depending on how many iRules you have archived (okay, so I may have more than a few iRules in my collection…) but it’s generally pretty snappy. One important thing to note at his point, however, is that all of your iRules are bolded with an asterisk next to them. This means they are not saved in their current state on the LTM. If you exit at this point, you’ll still be iRuleless, and no one wants that. Luckily Joe thought of that when building the iRule editor, so all you need to do is select File –> Save All, and you’ll be most of the way home. I say most of the way because there will undoubtedly be some errors that you’ll need to clean up. These will be config based errors, like pools that used to exist on your old system and don’t now, etc. You can either go create the pools in the config or comment out those lines. I tend to try and keep my iRules as config agnostic as possible while testing things, so there aren’t a ton of these but some of them always crop up. The editor makes these easy to spot and fix though. The name of the iRule that’s having a problem will stay bolded and any errors in that particular code will be called out (assuming you have that feature turned on) so you can pretty quickly spot them and fix them. This entire process took me about 15 minutes, including cleaning up the code in certain iRules to at least save properly on the new system, and I have a bunch of iRules, so that’s a pretty generous estimate. It really is quick, easy and painless to get your code onto an LTM VE and get hacking coding. An added side benefit, but a cool one, is that you now have your iRules backed up locally. Not only does this mean you’re double plus sure that they won’t be lost, but it means the next time you want to deploy them somewhere, all you have to do is import from the editor. So if you haven’t yet, go download your BIG-IP LTM VE and get started. I can’t recommend it enough. Also make sure to check out some of the really handy DC content that shows you how to tweak it for more interfaces or Joe’s supremely helpful guide on how to use a single VM to run an entire client/LTM/server setup. Wicked cool stuff. Happy iRuling. #Colin1.7KViews0likes2CommentsBIG-IP Configuration Conversion Scripts
Kirk Bauer, John Alam, and Pete White created a handful of perl and/or python scripts aimed at easing your migration from some of the “other guys” to BIG-IP. While they aren’t going to map every nook and cranny of the configurations to a BIG-IP feature, they will get you well along the way, taking out as much of the human error element as possible. Links to the codeshare articles below. Cisco ACE (perl) Cisco ACE via tmsh (perl) Cisco ACE (python) Cisco CSS (perl) Cisco CSS via tmsh (perl) Cisco CSM (perl) Citrix Netscaler (perl) Radware via tmsh (perl) Radware (python)2.4KViews1like13CommentsF5 Predicts: Education gets personal
The topic of education is taking centre stage today like never before. I think we can all agree that education has come a long way from the days where students and teachers were confined to a classroom with a chalkboard. Technology now underpins virtually every sector and education is no exception. The Internet is now the principal enabling mechanism by which students assemble, spread ideas and sow economic opportunities. Education data has become a hot topic in a quest to transform the manner in which students learn. According to Steven Ross, a professor at the Centre for Research and Reform in Education at Johns Hopkins University, the use of data to customise education for students will be the key driver for learning in the future[1]. This technological revolution has resulted in a surge of online learning courses accessible to anyone with a smart device. A two-year assessment of the massive open online courses (MOOCs) created by HarvardX and MITx revealed that there were 1.7 million course entries in the 68 MOOC [2]. This translates to about 1 million unique participants, who on average engage with 1.7 courses each. This equity of education is undoubtedly providing vast opportunities for students around the globe and improving their access to education. With more than half a million apps to choose from on different platforms such as the iOS and Android, both teachers and students can obtain digital resources on any subject. As education progresses in the digital era, here are some considerations for educational institutions to consider: Scale and security The emergence of a smogasborad of MOOC providers, such as Coursera and edX, have challenged the traditional, geographical and technological boundaries of education today. Digital learning will continue to grow driving the demand for seamless and user friendly learning environments. In addition, technological advancements in education offers new opportunities for government and enterprises. It will be most effective if provided these organisations have the ability to rapidly scale and adapt to an all new digital world – having information services easily available, accessible and secured. Many educational institutions have just as many users as those in large multinational corporations and are faced with the issue of scale when delivering applications. The aim now is no longer about how to get fast connection for students, but how quickly content can be provisioned and served and how seamless the user experience can be. No longer can traditional methods provide our customers with the horizontal scaling needed. They require an intelligent and flexible framework to deploy and manage applications and resources. Hence, having an application-centric infrastructure in place to accelerate the roll-out of curriculum to its user base, is critical in addition to securing user access and traffic in the overall environment. Ensuring connectivity We live in a Gen-Y world that demands a high level of convenience and speed from practically everyone and anything. This demand for convenience has brought about reform and revolutionised the way education is delivered to students. Furthermore, the Internet of things (IoT), has introduced a whole new raft of ways in which teachers can educate their students. Whether teaching and learning is via connected devices such as a Smart Board or iPad, seamless access to data and content have never been more pertinent than now. With the increasing reliance on Internet bandwidth, textbooks are no longer the primary means of educating, given that students are becoming more web oriented. The shift helps educational institutes to better personalise the curriculum based on data garnered from students and their work. Duty of care As the cloud continues to test and transform the realms of education around the world, educational institutions are opting for a centralised services model, where they can easily select the services they want delivered to students to enhance their learning experience. Hence, educational institutions have a duty of care around the type of content accessed and how it is obtained by students. They can enforce acceptable use policies by only delivering content that is useful to the curriculum, with strong user identification and access policies in place. By securing the app, malware and viruses can be mitigated from the institute’s environment. From an outbound perspective, educators can be assured that students are only getting the content they are meant to get access to. F5 has the answer BIG-IP LTM acts as the bedrock for educational organisations to provision, optimise and deliver its services. It provides the ability to publish applications out to the Internet in a quickly and timely manner within a controlled and secured environment. F5 crucially provides both the performance and the horizontal scaling required to meet the highest levels of throughput. At the same time, BIG-IP APM provides schools with the ability to leverage virtual desktop infrastructure (VDI) applications downstream, scale up and down and not have to install costly VDI gateways on site, whilst centralising the security decisions that come with it. As part of this, custom iApps can be developed to rapidly and consistently deliver, as well as reconfigure the applications that are published out to the Internet in a secure, seamless and manageable way. BIG-IP Application Security Manager (ASM) provides an application layer security to protect vital educational assets, as well as the applications and content being continuously published. ASM allows educational institutes to tailor security profiles that fit like a glove to wrap seamlessly around every application. It also gives a level of assurance that all applications are delivered in a secure manner. Education tomorrow It is hard not to feel the profound impact that technology has on education. Technology in the digital era has created a new level of personalised learning. The time is ripe for the digitisation of education, but the integrity of the process demands the presence of technology being at the forefront, so as to ensure the security, scalability and delivery of content and data. The equity of education that technology offers, helps with addressing factors such as access to education, language, affordability, distance, and equality. Furthermore, it eliminates geographical boundaries by enabling the mass delivery of quality education with the right policies in place. [1] http://www.wsj.com/articles/SB10001424052702304756104579451241225610478 [2] http://papers.ssrn.com/sol3/papers.cfm?abstract_id=25868471.2KViews0likes3Comments
APM Cookbook: Monitoring APM
I have a customer who recently needed to monitor the APM logon page but noticed the default HTTP monitor was eating up APM access sessions. To address this issue we need the HTTP monitor to retain the MRHSession cookie as it follows the redirect from / to /my.policy. After the monitor determines the health of the APM logon page it needs to also access the logout page to delete it's current access session. To accomplish this we can use the cookie jar option in curl: -c create the cookie jar -b uses an existing cookie jar We also tell curl to follow redirects with the -L argument. In the example code below the monitor is looking for the F5 licensing statement at the bottom of the APM logon page. If you've customized the APM logon page this monitor can easily be modified to fit your specific requirements. #!/bin/sh # # (c) Copyright 1996-2014 F5 Networks, Inc. # # This software is confidential and may contain trade secrets that are the # property of F5 Networks, Inc. No part of the software may be disclosed # to other parties without the express written consent of F5 Networks, Inc. # It is against the law to copy the software. No part of the software may # be reproduced, transmitted, or distributed in any form or by any means, # electronic or mechanical, including photocopying, recording, or information # storage and retrieval systems, for any purpose without the express written # permission of F5 Networks, Inc. Our services are only available for legal # users of the program, for instance in the event that we extend our services # by offering the updating of files via the Internet. # # @(#) $Id: http_monitor_cURL+GET,v 1.0 2007/06/28 16:10:15 deb Exp $ # (based on sample_monitor,v 1.3 2005/02/04 18:47:17 saxon) # # these arguments supplied automatically for all external monitors: # $1 = IP (IPv6 notation. IPv4 addresses are passed in the form # ::ffff:w.x.y.z # where "w.x.y.z" is the IPv4 address) # $2 = port (decimal, host byte order) # # remove IPv6/IPv4 compatibility prefix (LTM passes addresses in IPv6 format) IP=`echo ${1} | sed 's/::ffff://'` PORT=${2} PIDFILE="/var/run/`basename ${0}`.${IP}_${PORT}.pid" # kill of the last instance of this monitor if hung and log current pid if [ -f $PIDFILE ] then echo "EAV exceeded runtime needed to kill ${IP}:${PORT}" | logger -p local0.error kill -9 `cat $PIDFILE` > /dev/null 2>&1 fi echo "$$" > $PIDFILE # send request & check for expected response curl -Lsk https://${IP}:${PORT} -c cookiejar.txt | grep "This product is licensed from F5 Networks" > /dev/null # mark node UP if expected response was received if [ $? -eq 0 ] then rm -f $PIDFILE echo "UP" else rm -f $PIDFILE fi # delete APM session curl -Lsk https://${IP}:${PORT}/my.logout.php3 -b cookiejar.txt > /dev/null exit You can save this monitor to your F5 by following SOL13423 and for information on implementing external monitors click here.582Views0likes1Comment
LineRate and Redis pub/sub
Using the pre-installed Redis server on LineRate proxy, we can use pub/sub to push new configuration options and modify the layer 7 data path in real time. Background Each LineRate proxy has multiple data forwarding path processors; each of these processors runs an instance of the Node.js scripting engine. When a new HTTP request has to be processed, one of these script engines will process the request. Which actual script engine handles the request is not deterministic. A traditional approach to updating a script's configuration might be to embed an onRequest function in your script to handle an HTTP POST with new configuration options. However, given that only a single script engine will process this request, only the script running on that engine will 'see' the new options. Scripts running on any other engines will continue to use old options. Here we show you and easy way to push new options to all running processes. How to If you're not already familiar with Node.js and the LineRate scripting engine, you should check out the LineRate Scripting Developer's Guide. Let's jump into the Redis details. Redis is already installed and running on your LineRate proxy, so you can begin to use it immediately. If you're not familiar with the pub/sub concept, it's pretty straight-forward. The idea is that a publisher publishes a message on a particular channel and any subscribers that are subscribed to that same channel will receive the message. In this example, the message will be in JSON format. Be sure to take note of the fact that if your subscriber is not listening on the channel when a message is published, this message will never be seen by that subscriber. I've added some additional code that will store the published options in redis. Any time a subscriber connects, it will check for these values in redis and use them if they exist. This way, any subscriber will always use the most recently published options. Here is the code that will be added to the main script to handle the Redis subscribe function: // load the redis module var redis = require("redis"); // create the subscriber redis client var sub = redis.createClient(); // listen to and process 'message' events sub.on('message', function(channel, message) { // ... // get 'message' and store in 'opts' var opts = JSON.parse(message); // ... }); // subscribe to the 'options' channel sub.subscribe('options'); We can now insert these code pieces into a larger script that uses the options published in the options message. For example, you might want to use LineRate for it's ability to do HTTP traffic replication. You could publish an option called "load" that controls what percentage of requests get replicated. All script engines will 'consume' this message, update the load variable and immediately start replicating only the percentage of requests that you specified. It just so happens we have some code for this. See below in the section sampled_traffic_replication.js for a fully commented script that does sampled traffic replication using parameters received from Redis. It should also be mentioned that if you have multiple LineRate's all performing the same function, they can all subscribe to the same Redis server/channel and all take the appropriate action - all at the same time, all in real-time. Of course we need a way to actually publish new options to the 'options' channel. This could be done in myriad ways. I've included a fully commented Node.js script below called publish_config.js that prompts the user for the appropriate options on the command line and then publishes those options to the 'options' channel. Lastly, here's a sample proxy config snippet for LineRate that you would need: [...] virtual-server vsPrimary attach vipPrimary default attach real-server group ... virtual-server vsReplicate attach vipReplicate default attach real-server group ... virtual-ip vipPrimary admin-status online ip address 192.0.2.10 80 virtual-ip vipReplicate admin-status online ip address 127.0.0.1 8080 [...] sampled_traffic_replication.js "use strict"; var vsm = require('lrs/virtualServerModule'); var http = require('http'); var redis = require("redis"), sub = redis.createClient(); // define initial config options var replicateOptions = { ip: '127.0.0.1', port: 8080, // Replicate every pickInterval requests // by default, don't replicate any traffic pickInterval: 0 }; // pubsub error handling sub.on("error", function(err) { console.log("Redis subscribe Error: " + err); }); // if options already exist in redis, use them sub.on("ready", function() { sub.get('config_options', function (err, reply) { if (reply !== null) { process_options(reply); } }); // switch to subscriber mode to // listen for any published options sub.subscribe('options'); }); function process_options(opts) { opts = JSON.parse(opts); // only update config params if not null if (opts.virtual_server_ip) { replicateOptions.ip = opts.virtual_server_ip; } if (opts.virtual_server_port) { replicateOptions.port = opts.virtual_server_port; } // convert 'load' to 'pickInterval' for internal use if (opts.load) { // convert opts.load string to int opts.load = parseInt(opts.load, 10); if (opts.load === 0) { replicateOptions.pickInterval = opts.load; } else { replicateOptions.pickInterval = Math.round(1 / (opts.load / 100)); } } console.log("Updated options: " + JSON.stringify(replicateOptions)); } var tapServerRequest = function(servReq, servResp, options, onResponse) { // There is no built-in method to clone a request, so we must generate a new // request based on the existing request and send it to the replicate VIP var newReq = http.request({ host: options.ip, port: options.port, method: servReq.method, path: servReq.url}, onResponse); servReq.bindHeaders(newReq); servReq.pipe(newReq); return newReq; } // Listen for config updates on 'options' channel sub.on('message', function(channel, message) { console.log(process.pid + ' Updating config(' + channel + ': ' + message); process_options(message); }); vsm.on('exist', 'vsPrimary', function(vs) { console.log('Replicate traffic script installed on Virtual Server: ' + vs.id); var reqCount = 0; vs.on('request', function(servReq, servResp, cliReq) { var tapStart = Date.now(); var to; var aborted = false; reqCount++; // // decide if request should be replicated; replicate if so // // be sure to handle "0" load scenario gracefully // if (replicateOptions.pickInterval && reqCount % replicateOptions.pickInterval == 0) { var newReq = tapServerRequest(servReq, servResp, replicateOptions, function(resp) { // a close event indicates an improper connection termination resp.on('close', function(err) { console.log('Replicated response error: ' + err); }); resp.on('end', function(err) { console.log('Replicated response error:' + aborted); clearTimeout(to); }); }); // // if replicated request timer exceeds 500ms, abort the request // to = setTimeout(function() { aborted = true; newReq.abort(); }, 500); } // // also send original request along the normal data path // servReq.bindHeaders(cliReq); servReq.pipe(cliReq); cliReq.on('response', function(cliResp) { cliResp.bindHeaders(servResp); cliResp.fastPipe(servResp); }); }); }); publish_config.js "use strict"; var prompt = require('prompt'); var redis = require('redis'); // note you might need Redis server connection // parameters defined here for use in createClient() // method. var redis_client = redis.createClient(); var config_channel = 'options'; var schema = { properties: { virtual_server_ip: { description: 'Virtual Server IP', pattern: /^[0-9]{1,3}\.[0-9]{1,3}\.[0-9]{1,3}\.[0-9]{1,3}$/, message: 'Must be an IP address', required: false }, virtual_server_port: { description: 'Virtual Server port number', pattern: /^[0-9]{1,5}$/, message: 'Must be an integer between 1 and 65535', require: false }, load: { description: 'Percentage of load to replicate', pattern: /^[0-9]{1,3}$/, message: 'Must be an integer between 0 and 100', require: false } } }; prompt.start(); function get_info() { console.log('Enter values; leave blank to not update'); prompt.get(schema, function (err, result) { if (err) { return prompt_error(err); } // // TODO: do some input validation here // var config = JSON.stringify(result) console.log('Sending: ' + config) // publish options via pub/sub redis_publish_message(config_channel, config); redis_client.end(); }); } function redis_publish_message(channel, message) { // publish redis_client.publish(channel,message); // also store JSON message in redis redis_client.set("config_options", message) } function prompt_error(err) { console.log(err); return 1; } //main get_info(); Additional Resources Download LineRate LineRate Scripting Developer's Guide LineRate solution articles LineRate DevCentral435Views0likes0Comments
2.5 bad ways to implement a server load balancing architecture
I'm in a bit of mood after reading a Javaworld article on server load balancing that presents some fairly poor ideas on architectural implementations. It's not the concepts that are necessarily wrong; they will work. It's the architectures offered as a method of load balancing made me do a double-take and say "What?" I started reading this article because it was part 2 of a series on load balancing and this installment focused on application layer load balancing. You know, layer 7 load balancing. Something we at F5 just might know a thing or two about. But you never know where and from whom you'll learn something new, so I was eager to dive in and learn something. I learned something alright. I learned a couple of bad ways to implement a server load balancing architecture. TWO LOAD BALANCERS? The first indication I wasn't going to be pleased with these suggestions came with the description of a "popular" load-balancing architecture that included two load balancers: one for the transport layer (layer 4) and another for the application layer (layer 7). In contrast to low-level load balancing solutions, application-level server load balancing operates with application knowledge. One popular load-balancing architecture, shown in Figure 1, includes both an application-level load balancer and a transport-level load balancer. Even the most rudimentary, entry level load balancers on the market today - software and hardware, free and commercial - can handle both transport and application layer load balancing. There is absolutely no need to deploy two separate load balancers to handle two different layers in the stack. This is a poor architecture introducing unnecessary management and architectural complexity as well as additional points of failure into the network architecture. It's bad for performance because it introduces additional hops and points of inspection through which application messages must flow. To give the author credit he does recognize this and offers up a second option to counter the negative impact of the "additional network hops." One way to avoid additional network hops is to make use of the HTTP redirect directive. With the help of the redirect directive, the server reroutes a client to another location. Instead of returning the requested object, the server returns a redirect response such as 303. I found it interesting that the author cited an HTTP response code of 303, which is rarely returned in conjunction with redirects. More often a 302 is used. But it is valid, if not a bit odd. That's not the real problem with this one, anyway. The author claims "The HTTP redirect approach has two weaknesses." That's true, it has two weaknesses - and a few more as well. He correctly identifies that this approach does nothing for availability and exposes the infrastructure, which is a security risk. But he fails to mention that using HTTP redirects introduces additional latency because it requires additional requests that must be made by the client (increasing network traffic), and that it is further incapable of providing any other advanced functionality at the load balancing point because it essentially turns the architecture into a variation of a DSR (direct server return) configuration. THAT"S ONLY 2 BAD WAYS, WHERE'S THE .5? The half bad way comes from the fact that the solutions are presented as a Java based solution. They will work in the sense that they do what the author says they'll do, but they won't scale. Consider this: the reason you're implementing load balancing is to scale, because one server can't handle the load. A solution that involves putting a single server - with the same limitations on connections and session tables - in front of two servers with essentially the twice the capacity of the load balancer gains you nothing. The single server may be able to handle 1.5 times (if you're lucky) what the servers serving applications may be capable of due to the fact that the burden of processing application requests has been offloaded to the application servers, but you're still limited in the number of concurrent users and connections you can handle because it's limited by the platform on which you are deploying the solution. An application server acting as a cluster controller or load balancer simply doesn't scale as well as a purpose-built load balancing solution because it isn't optimized to be a load balancer and its resource management is limited to that of a typical application server. That's true whether you're using a software solution like Apache mod_proxy_balancer or hardware solution. So if you're implementing this type of a solution to scale an application, you aren't going to see the benefits you think you are, and in fact you may see a degradation of performance due to the introduction of additional hops, additional processing, and poorly designed network architectures. I'm all for load balancing, obviously, but I'm also all for doing it the right way. And these solutions are just not the right way to implement a load balancing solution unless you're trying to learn the concepts involved or are in a computer science class in college. If you're going to do something, do it right. And doing it right means taking into consideration the goals of the solution you're trying to implement. The goals of a load balancing solution are to provide availability and scale, neither of which the solutions presented in this article will truly achieve.614Views0likes1Comment